Private Keys & HD Wallets - EVM key management
Complete guide to EVM private key management on SettleMint. Learn ECDSA vs HD wallets, transaction signing, user wallet generation, and enterprise security patterns for Ethereum, Polygon, and Arbitrum networks.
Summary
To send transactions on a blockchain, you need a private key (with enough funds for gas for networks with a fee). You can create and manage private keys directly within SettleMint using ECDSA, HD ECDSA, or HSM key types.
After creating a key, it must be attached to at least one node to enable transaction signing, this is critical for smart contract deployment. Without it, the deployment will fail.
SettleMint also offers user wallets, a scalable solution that generates wallets from a single HD ECDSA 256 key. Each user gets a unique address for privacy and parallel transaction support. You can create user wallets once your HD key is deployed and running, and fund them as needed for gas-based transactions.
How to add private keys and user wallets in SettleMint platform
Private keys
Sending transactions on a blockchain network requires two essential components: a private key to cryptographically sign your transactions, and sufficient funds in your wallet to cover the associated gas fees. Without either element, transaction execution will fail.
While you can use external private keys created with tools like MetaMask or other wallet solutions, SettleMint offers a more integrated approach. The platform provides built-in functionality to create and manage private keys directly within your environment, eliminating the need for external wallet management. When you deploy a blockchain node, it contains a signing proxy that captures the eth_sendTransaction call, uses the appropriate key from the private key section to sign it, and sends it onwards to the blockchain node. You can use this proxy directly via the node's JSON-RPC endpoints (JSON-RPC) and via tools like Hardhat (HardHat RPC) configured to use the "remote" default option for signing.
Create a private key
To add a private key in the SettleMint platform, navigate to the private keys
section and click create a private key. You'll be prompted to select the type of
private key, ECDSA P256, HD ECDSA P256, or HSM ECDSA P256.
Navigate to your application, click private keys in the left navigation, and then click create a private key. This opens a form.
Follow these steps to create the private key:
-
Choose a private key type:
- Accessible ECDSA P256: Standard Ethereum-style private keys with exposed mnemonic
- HD ECDSA P256: Hierarchical Deterministic keys for advanced key management
- HSM ECDSA P256: Hardware Security Module protected keys for maximum security
-
Choose a name for your private key
-
Select the nodes on which you want the key to be active
-
Click confirm to create the key
# Create Accessible ECDSA P256 key
settlemint platform create private-key accessible-ecdsa-p256 my-key \
  --application my-app \
  --blockchain-node node-123

# Create HD ECDSA P256 key
settlemint platform create private-key hd-ecdsa-p256 my-key \
  --application my-app

# Create HSM ECDSA P256 key
settlemint platform create private-key hsm-ecdsa-p256 my-key \
  --application my-app
import { createSettleMintClient } from '@settlemint/sdk-js';
const client = createSettleMintClient({
accessToken: 'your_access_token',
instance: 'https://console.settlemint.com'
});
// Create private key
const createKey = async () => {
const result = await client.privateKey.create({
name: "my-key",
applicationUniqueName: "my-app",
privateKeyType: "ACCESSIBLE_ECDSA_P256", // or "HD_ECDSA_P256" or "HSM_ECDSA_P256"
blockchainNodeUniqueNames: ["node-123"] // optional
});
console.log('Private key created:', result);
};Attaching private keys to blockchain nodes (transaction signer)
Every smart contract deployment involves a transaction that must be signed by an authorized account. This signature proves that the transaction came from a valid identity and permits it to be processed by the network. When using SettleMint, deploying a smart contract via the platform UI or SDK initiates an eth_sendTransaction call, which must be signed by a private key. However, nodes cannot inherently sign transactions unless a key has been explicitly activated and attached to them.
If no private key is attached to the node involved in the deployment, the process will halt at the signing step. The platform will not be able to authorize the deployment transaction, resulting in a failed operation. This makes key-to-node assignment a required step in any production or test setup involving deployment, contract interactions, or any state-changing blockchain transaction.
How to attach a private key to a node
- Go to the private keys section of your SettleMint workspace.
- Click on the private key (e.g., "Deployer") you wish to use for signing transactions.
- Navigate to the nodes tab of that private key's page.
- You'll see a list of available nodes in your network (validator and RPC nodes).
- Select the nodes that should use this key for transaction signing. These will usually be RPC nodes or validators depending on your setup.
- Once selected, the key becomes active on these nodes and is used for signing all outgoing transactions initiated from the platform.
Best practices and nuances
- Always attach the key to at least one node before deploying a smart contract. In most cases, attaching it to an RPC node is sufficient.
- Avoid attaching the same key to multiple nodes unless required, to reduce the risk of key misuse or unnecessary transaction replay.
- Ensure the private key has sufficient funds (ETH or native token) to pay for gas costs associated with contract deployment if working on public chains or non-zero gas fee networks.
- For security reasons, only assign signing permissions to nodes you trust and control.
- Consider using an HD key if you want to manage multiple identities derived from the same mnemonic, but ensure the correct derivation path is used.
Manage private keys
- Navigate to your application's private keys section
- Click on a private key to:
- View details and status
- Manage node associations
- Check balances
- Fund the key
# List all private keys
settlemint platform list private-keys --application <app-name>

# View specific key details
settlemint platform read private-key <private-key-unique-name>

# Restart a private key
settlemint platform restart private-key <private-key-unique-name>
// List private keys
const listKeys = async () => {
const keys = await client.privateKey.list("your-app-name");
};
// Get key details
const getKey = async () => {
const key = await client.privateKey.read("key-unique-name");
};
// Restart key
const restartKey = async () => {
await client.privateKey.restart("key-unique-name");
};Fund the private key
For networks that require gas to perform a transaction, your private key should contain enough funds to cover the gas price.
- Click the private key in the overview to see detailed information
- Open the balances tab
- Use the public address of the wallet which you want to fund for sending tokens/currency to it.
Ensure your private key has sufficient funds before attempting transactions on networks that require gas fees.
User wallets
SettleMint's user wallets feature offers a production-ready solution for managing infinite wallets with efficiency and scalability. This tool empowers users with seamless wallet generation, ensuring cost-effective management and eliminating additional expenses. By generating unique addresses for each user, privacy is significantly enhanced, while improved performance ensures faster, parallel transaction processing through separate nonces. User wallet also simplifies wallet recovery since all wallets are derived from a single master key. User wallets use the same signing proxy to sign transactions with the corresponding user private key.
Create and setup user wallets
To set up your user wallets, navigate to your application, click private keys in the left navigation, and then click create a private key. This opens a form.
Select HD ECDSA P256 as the private key type then, enter a name for your deployment. You can also select the nodes or load balancers on which you want to enable the user wallets. You can change this later if you want to use your user wallets on a different node. Click confirm to deploy the wallet.
Difference between ECDSA and HD ECDSA key and why we do not see user wallets in simple ECDSA keys.
A simple ECDSA key is just one key pair , a private key and its corresponding public key. It can be used to sign transactions and control a blockchain address, but it’s standalone. There’s no built-in mechanism to derive more keys from it. If you want multiple accounts, you’d need to manually generate and store each key separately. An HD (Hierarchical Deterministic) wallet, on the other hand, starts from a single master seed. From this seed, it can generate an entire tree of ECDSA key pairs in a structured and repeatable way. This system follows the BIP-32 standard and includes concepts like key derivation paths and chain codes.
The reason HD wallets are suitable for managing wallets is that they support deterministic key generation. You can recreate the full wallet from just the seed phrase. Each new account or address is simply a derived key from a known path. This is efficient and secure, and it also simplifies backup and recovery. Simple ECDSA keys lack this structure. They are isolated, and generating multiple keys would require managing each one individually. This doesn’t scale for wallets, especially those that require many accounts, addresses, or identities. That’s why HD ECDSA key systems are preferred in wallet implementation.
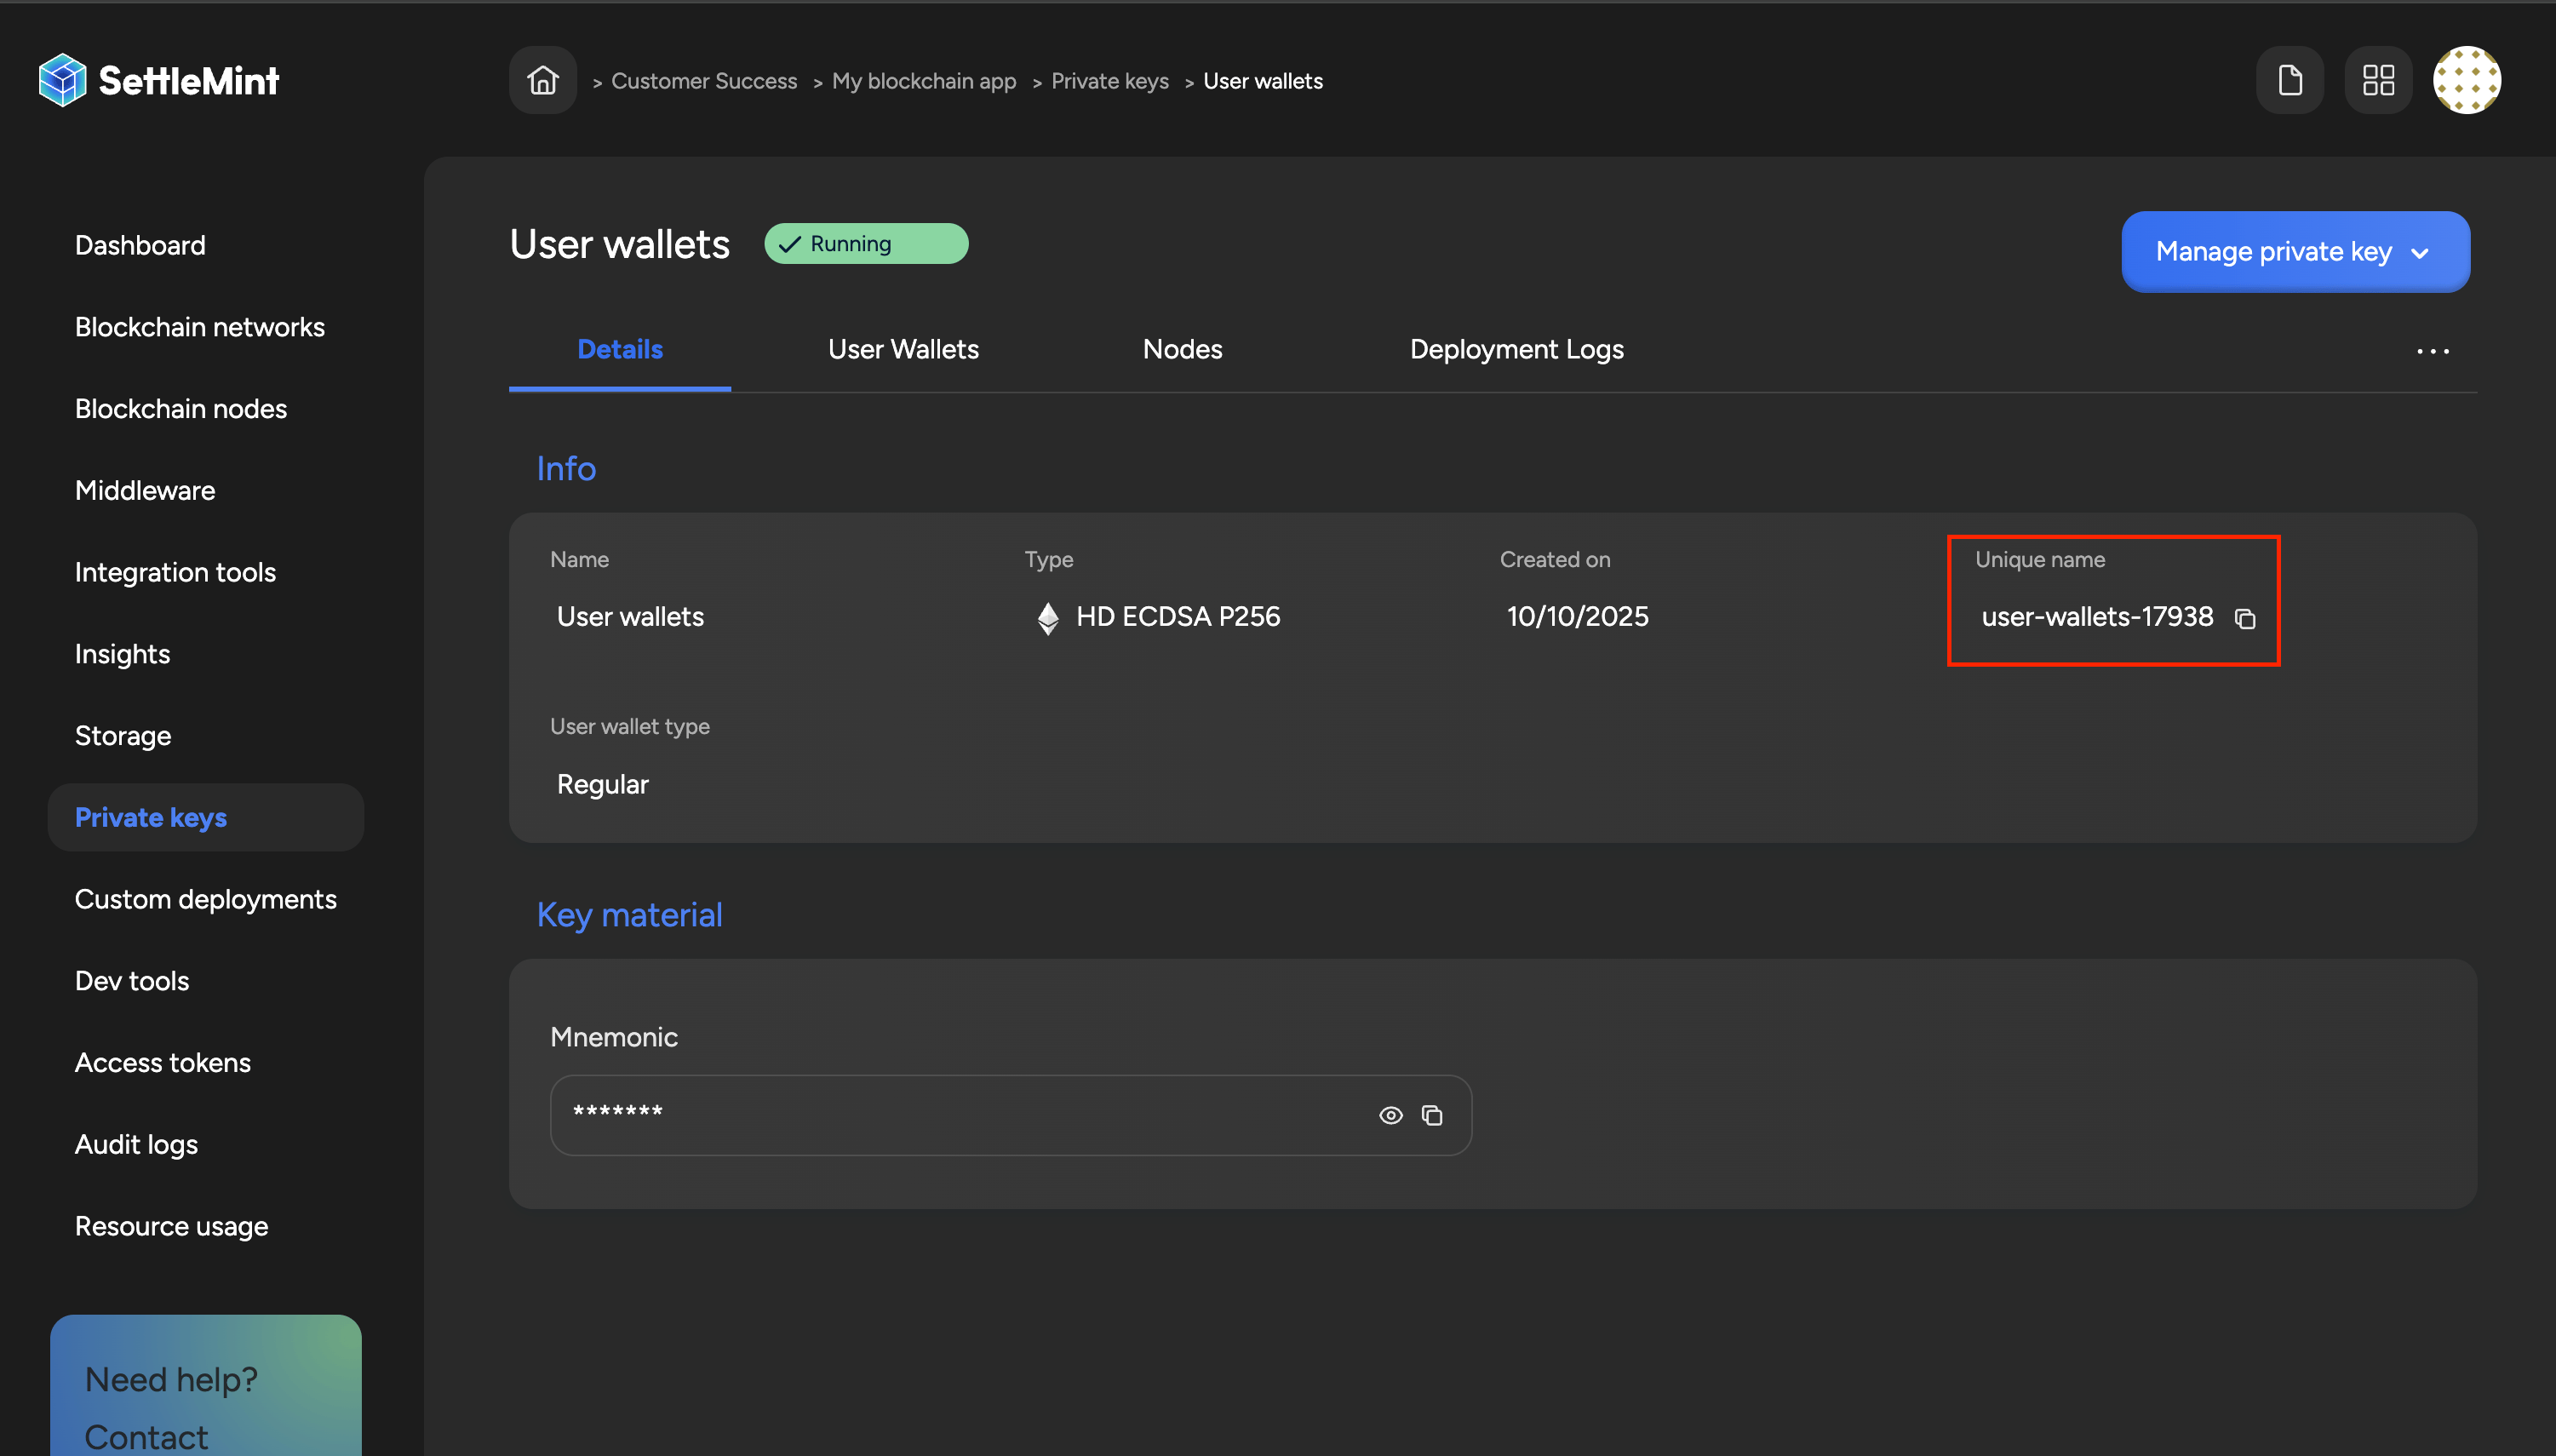
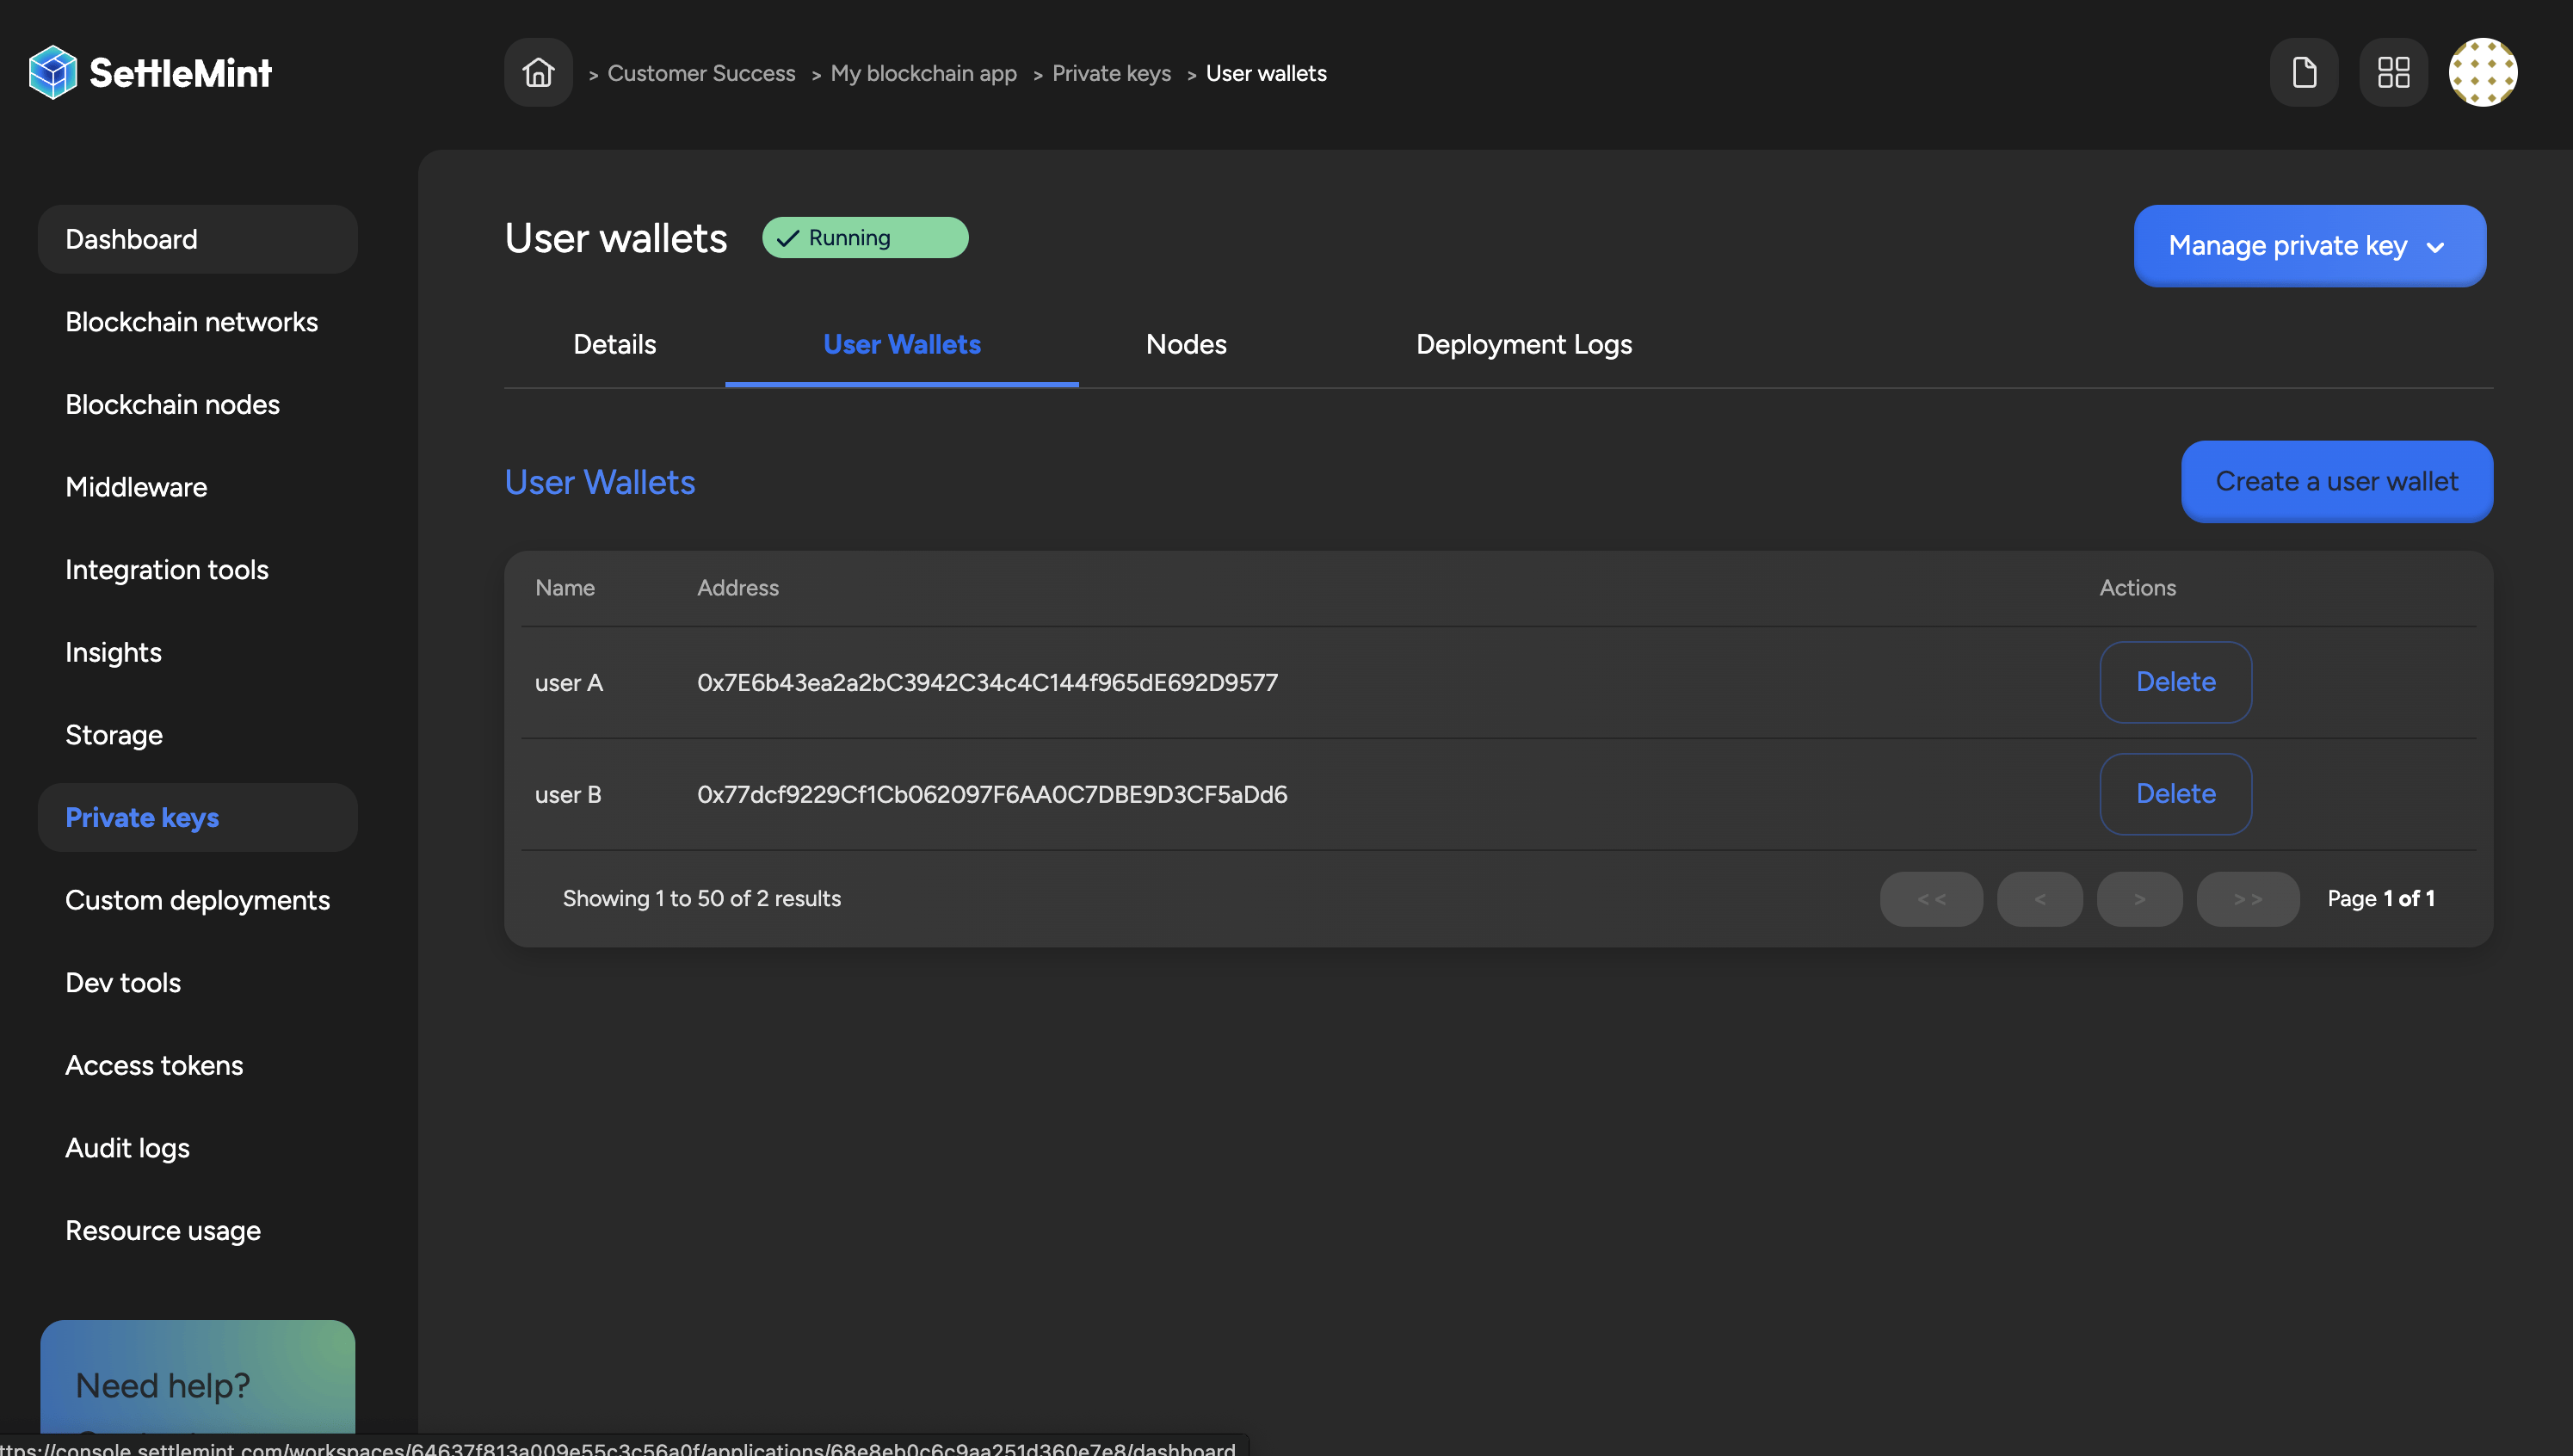
When your deployment status is running, you can click on it to check the details. You can see the mnemonic from which the user wallets are generated under key material. Upon initialization, the user wallets section is empty. To create your first user wallet, click on create a user wallet.
Remember that for networks that require gas to perform a transaction, the user wallet should contain enough funds to cover the gas price. You can fund it using the address displayed in the list.
Create user wallet via Smart Contract Portal (REST)
Prerequisites
- Ensure your HD User Wallets are deployed. See Create and setup user wallets.
- Ensure the Smart Contract Portal is deployed. See API Portal Setup.
Steps
- Open your Smart Contract Portal middleware and go to the
RESTtab. - In the left menu, expand
Walletand selectPOST /wallets. - Fill the request body:
keyVaultId: Unique name/ID of your HD User Wallets instance (for example,user-wallets-17938).walletInfo.name: Label for the generated user wallet (for example,user A).walletInfo.walletIndex: Index of the wallet to derive (0-based integer).
{
  "keyVaultId": "user-wallets-17938",
  "walletInfo": {
    "name": "user A",
    "walletIndex": 0
  }
}
- Send the request. On success, the response contains the new wallet
addressand itsderivationPath. - Verify the wallet: go to
Private keys→ open your HD wallet →User Walletstab; the new wallet appears in the list.
Use unique names and keep track of each walletIndex you allocate to avoid duplicates.
HTTP request example (cURL)
To call the endpoint directly, obtain the base URL from the portal's Connect tab and use your access token.
curl https://<your-portal-base>/wallets \
  --request POST \
  --header 'Content-Type: application/json' \
  --header 'x-auth-token: <ACCESS_TOKEN>' \
  --data '{
    "keyVaultId": "user-wallets-03a52",
    "walletInfo": {
      "name": "wallet name for user A",
      "walletIndex": 0
    }
  }'
Congratulations!
You have successfully created private keys and user wallets.
You have also attached private keys to node transaction signer and you are ready for smart contract development and deployment.
Network & Nodes Setup
Complete guide to deploying EVM blockchain networks on SettleMint. Learn how to add Ethereum, Polygon, and Arbitrum networks with validator nodes for enterprise dApps. Includes gas optimization, multi-chain deployment, and fault tolerance strategies.
Code Studio Setup
Guide to setup code studio IDE to develop and deploy smart contracts and sub-graphs