Connect A Front End - NextJS
This guide will show you how to build a full stack application using SettleMint, Polygon, wagmi and NextJS. If this is your first time using SettleMint, we recommend the Hello World Guide.
In this guide, you will learn how to connect a custom front end to your blockchain application using:
- SettleMint to deploy an ERC-20 smart contract to Polygon
- wagmi and NextJS to build a frontend to transfer tokens
- Web3Auth to make the transfer and receive the tokens polygon To complete this guide, please have the following installed:
- Bun
- The Metamask Wallet Extension
- A code editor (ex:VSCode).
At the end of this guide, you will have deployed an ERC-20 token smart contract to the Polygon Amoy Testnet and connected a front end to interact with this smart contract. The front end will allow us to send tokens that we created to any wallet address.
Part 1: The Blockchain Application
Create a New Blockchain Application
The first step is to create a new blockchain application on SettleMint. This is done by clicking on the grid icon in the top right and selecting Create new application.
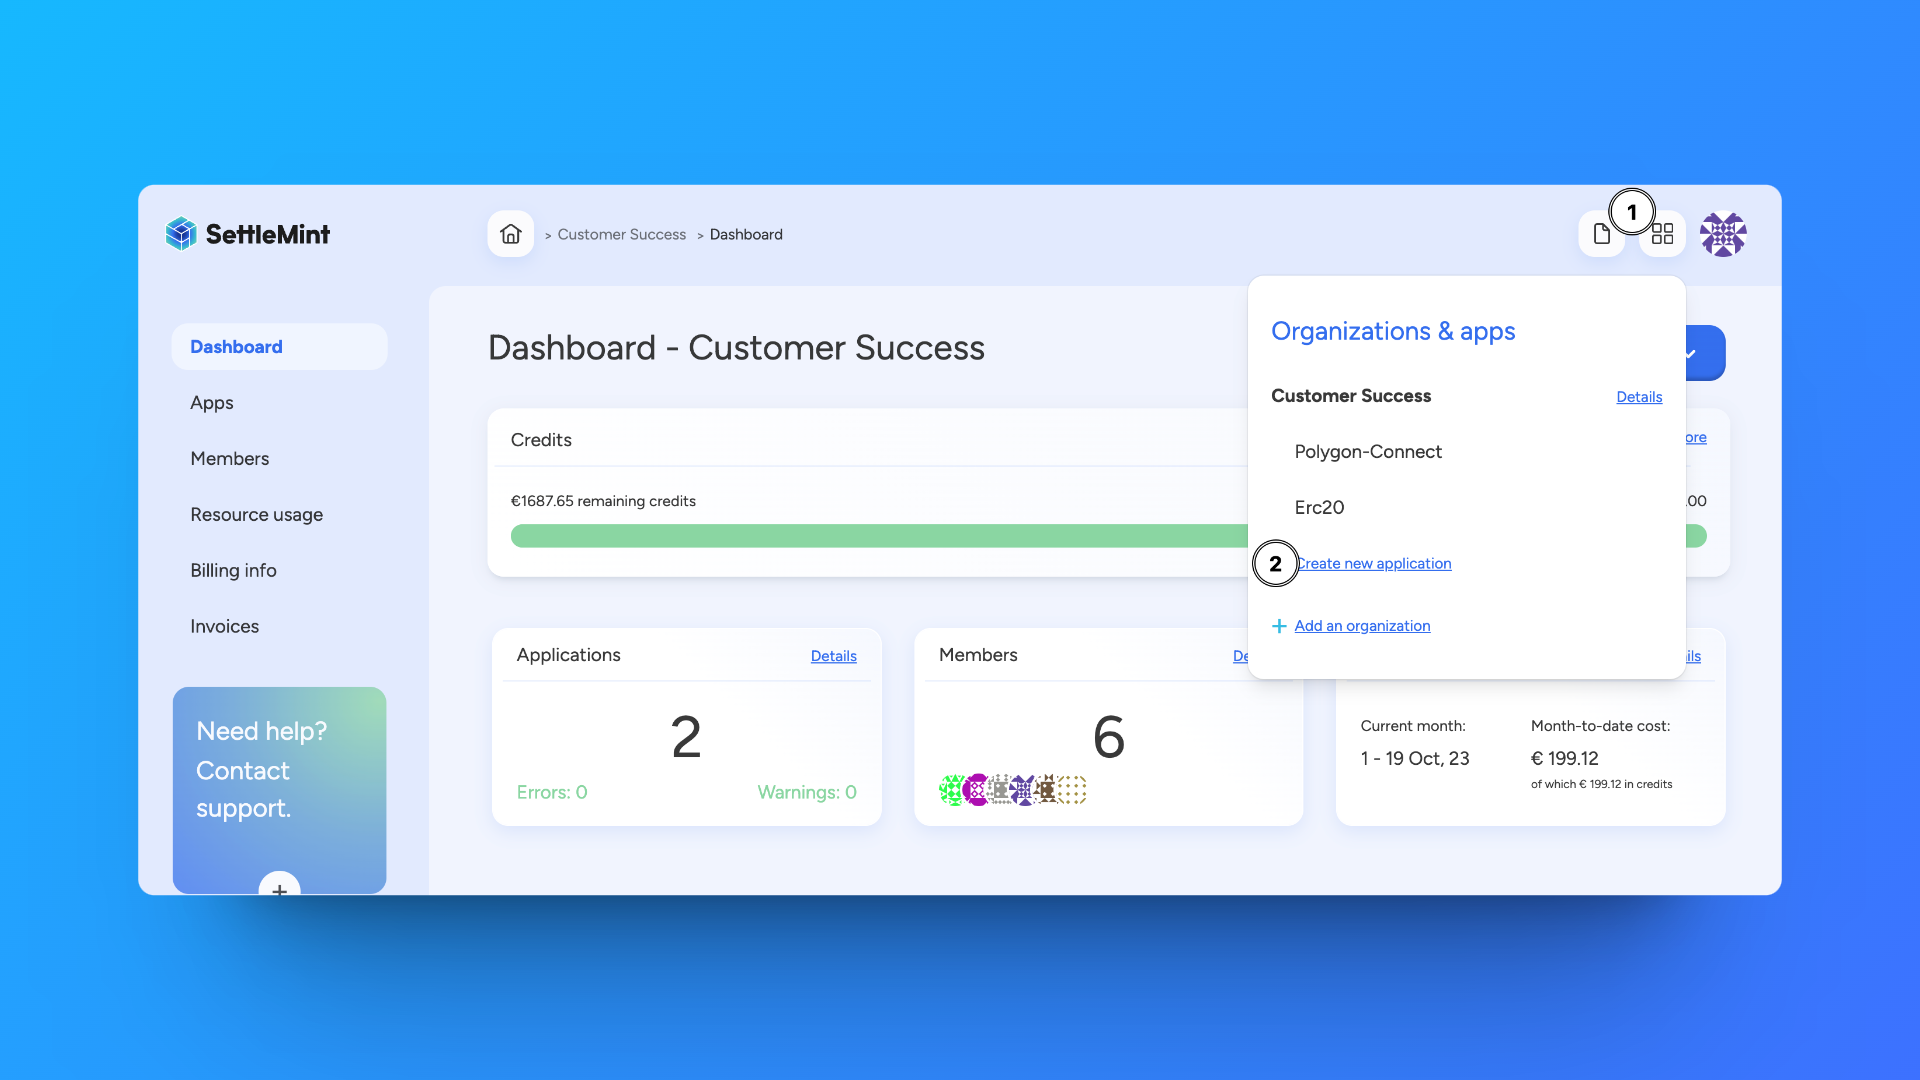
For this guide, we will name this application TokenSender.
Add a Blockchain Network and Node
After creating an application, we need to create a Blockchain Network and Node to deploy to. This is done by clicking on the Add a blockchain network from the Application Dashboard.
We will deploy our smart contract to the Polygon Amoy Testnet like the image below:
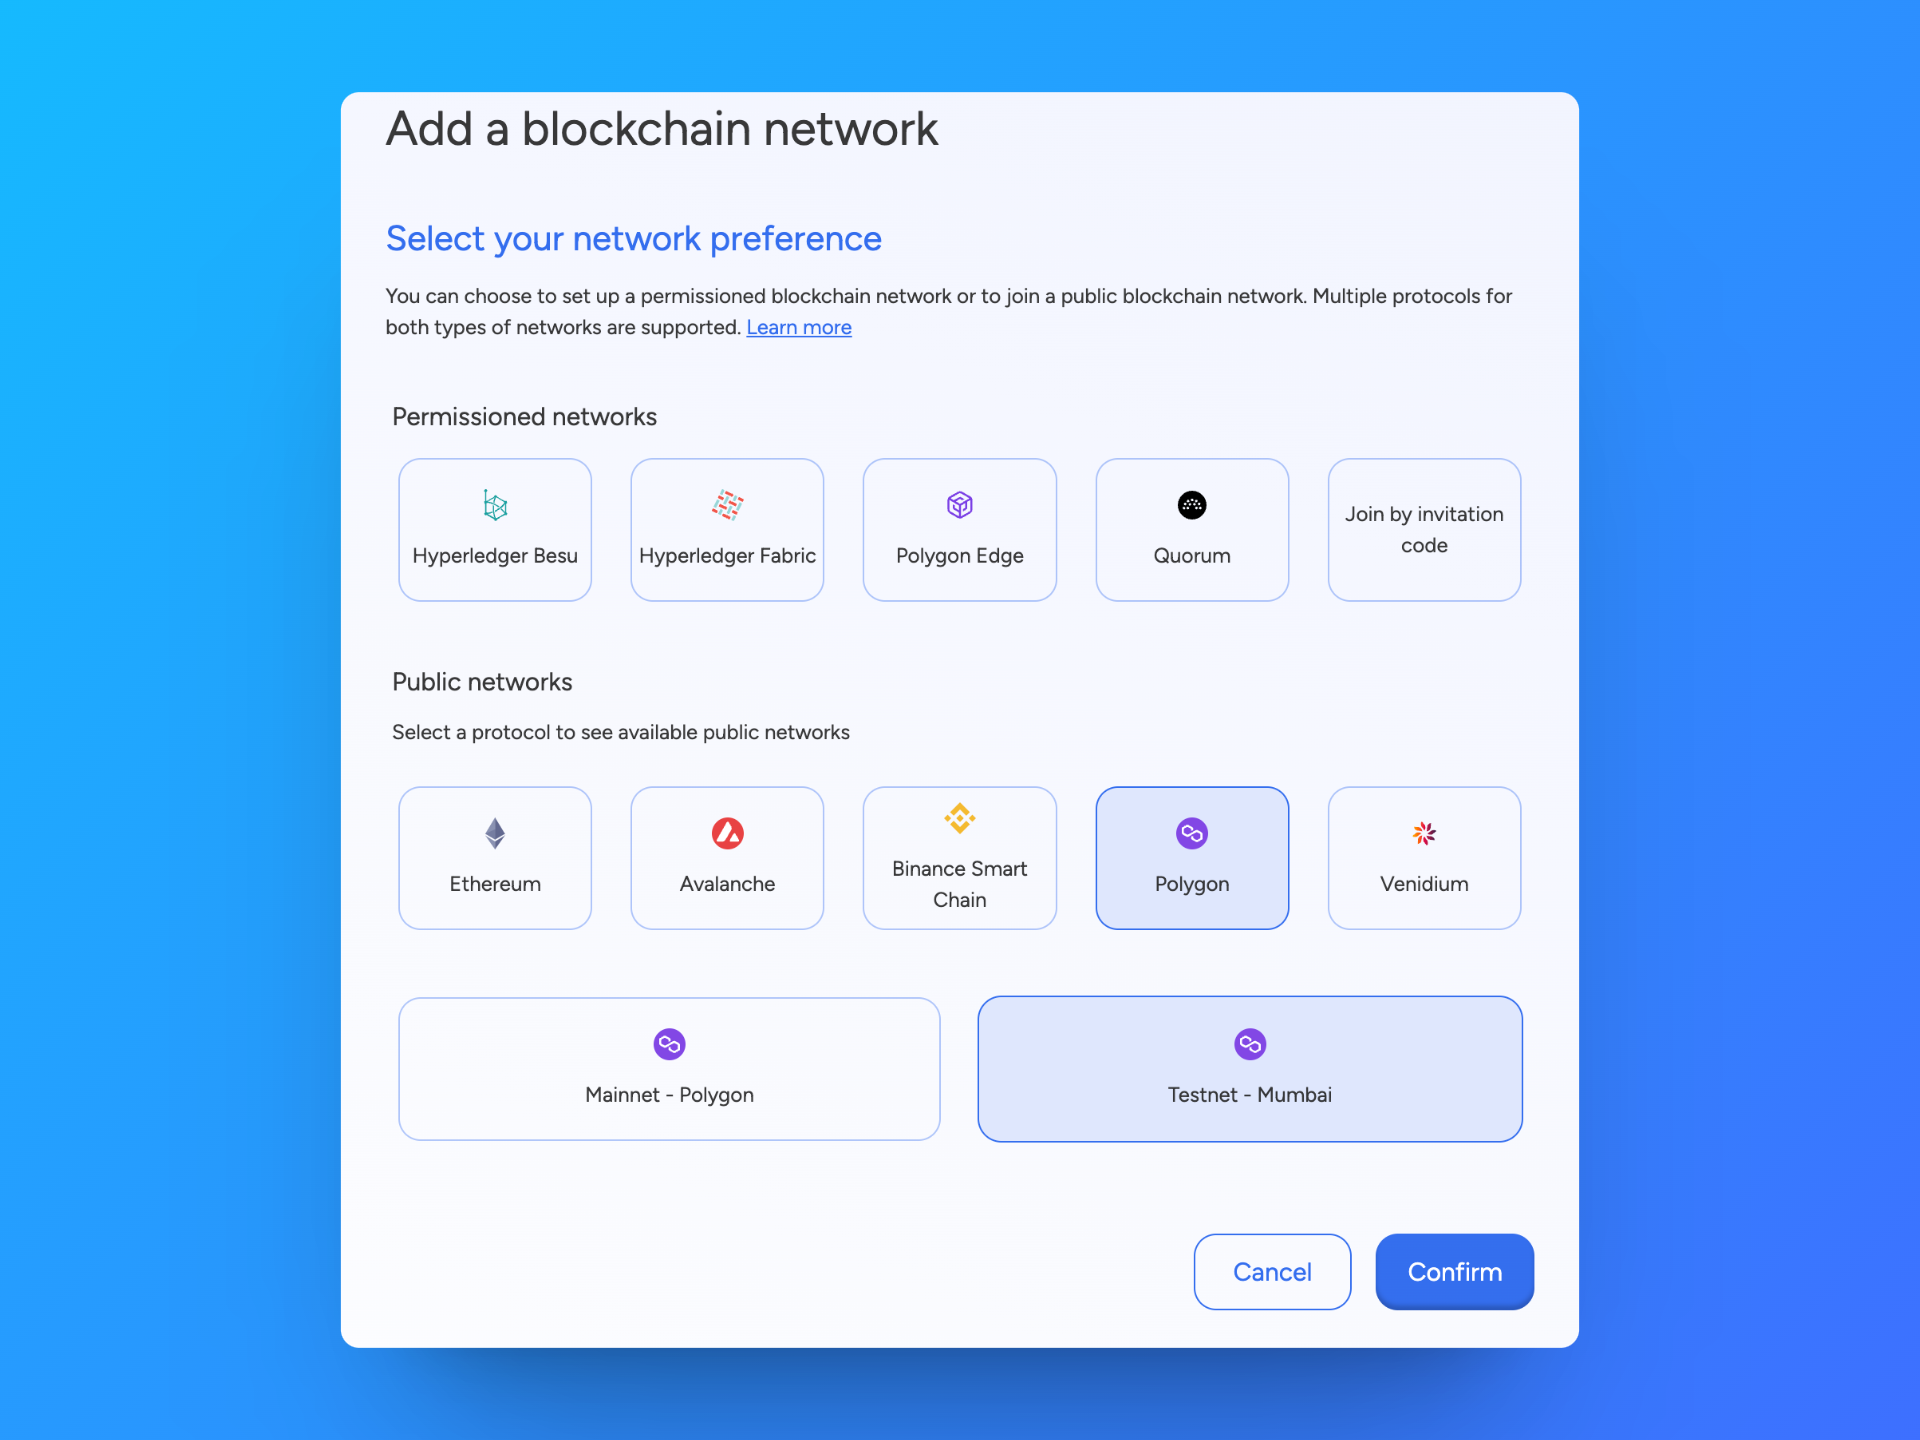
We can continue to use the TokenSender name for the naming of the network.
It is now time to choose a deployment plan. Here is the configuration most suitable for this application:
- Type: Shared
- Cloud Provider: Any
- Region: Closest to Your Location
- Resource Pack: Small
Creating a Private Key
To deploy our smart contract and send tokens, we need funds to cover the transfer cost. To do this we will create a Private Key and then receive MATIC tokens, the native token of the Amoy testnet, from the faucet. Faucets allow us to get free test tokens to spend on a testnet.
To make a Private Key, click on the Private Key link on the right side of the dashboard. Once there, select Create a Private Key.
Below is the configuration you should use for your private key:
- Private Key Type Accessible EC DSA P256
- Name TokenSender
- Node TokenSender
Now that we have our private key address, we can copy the address and go to the Polygon Faucet:
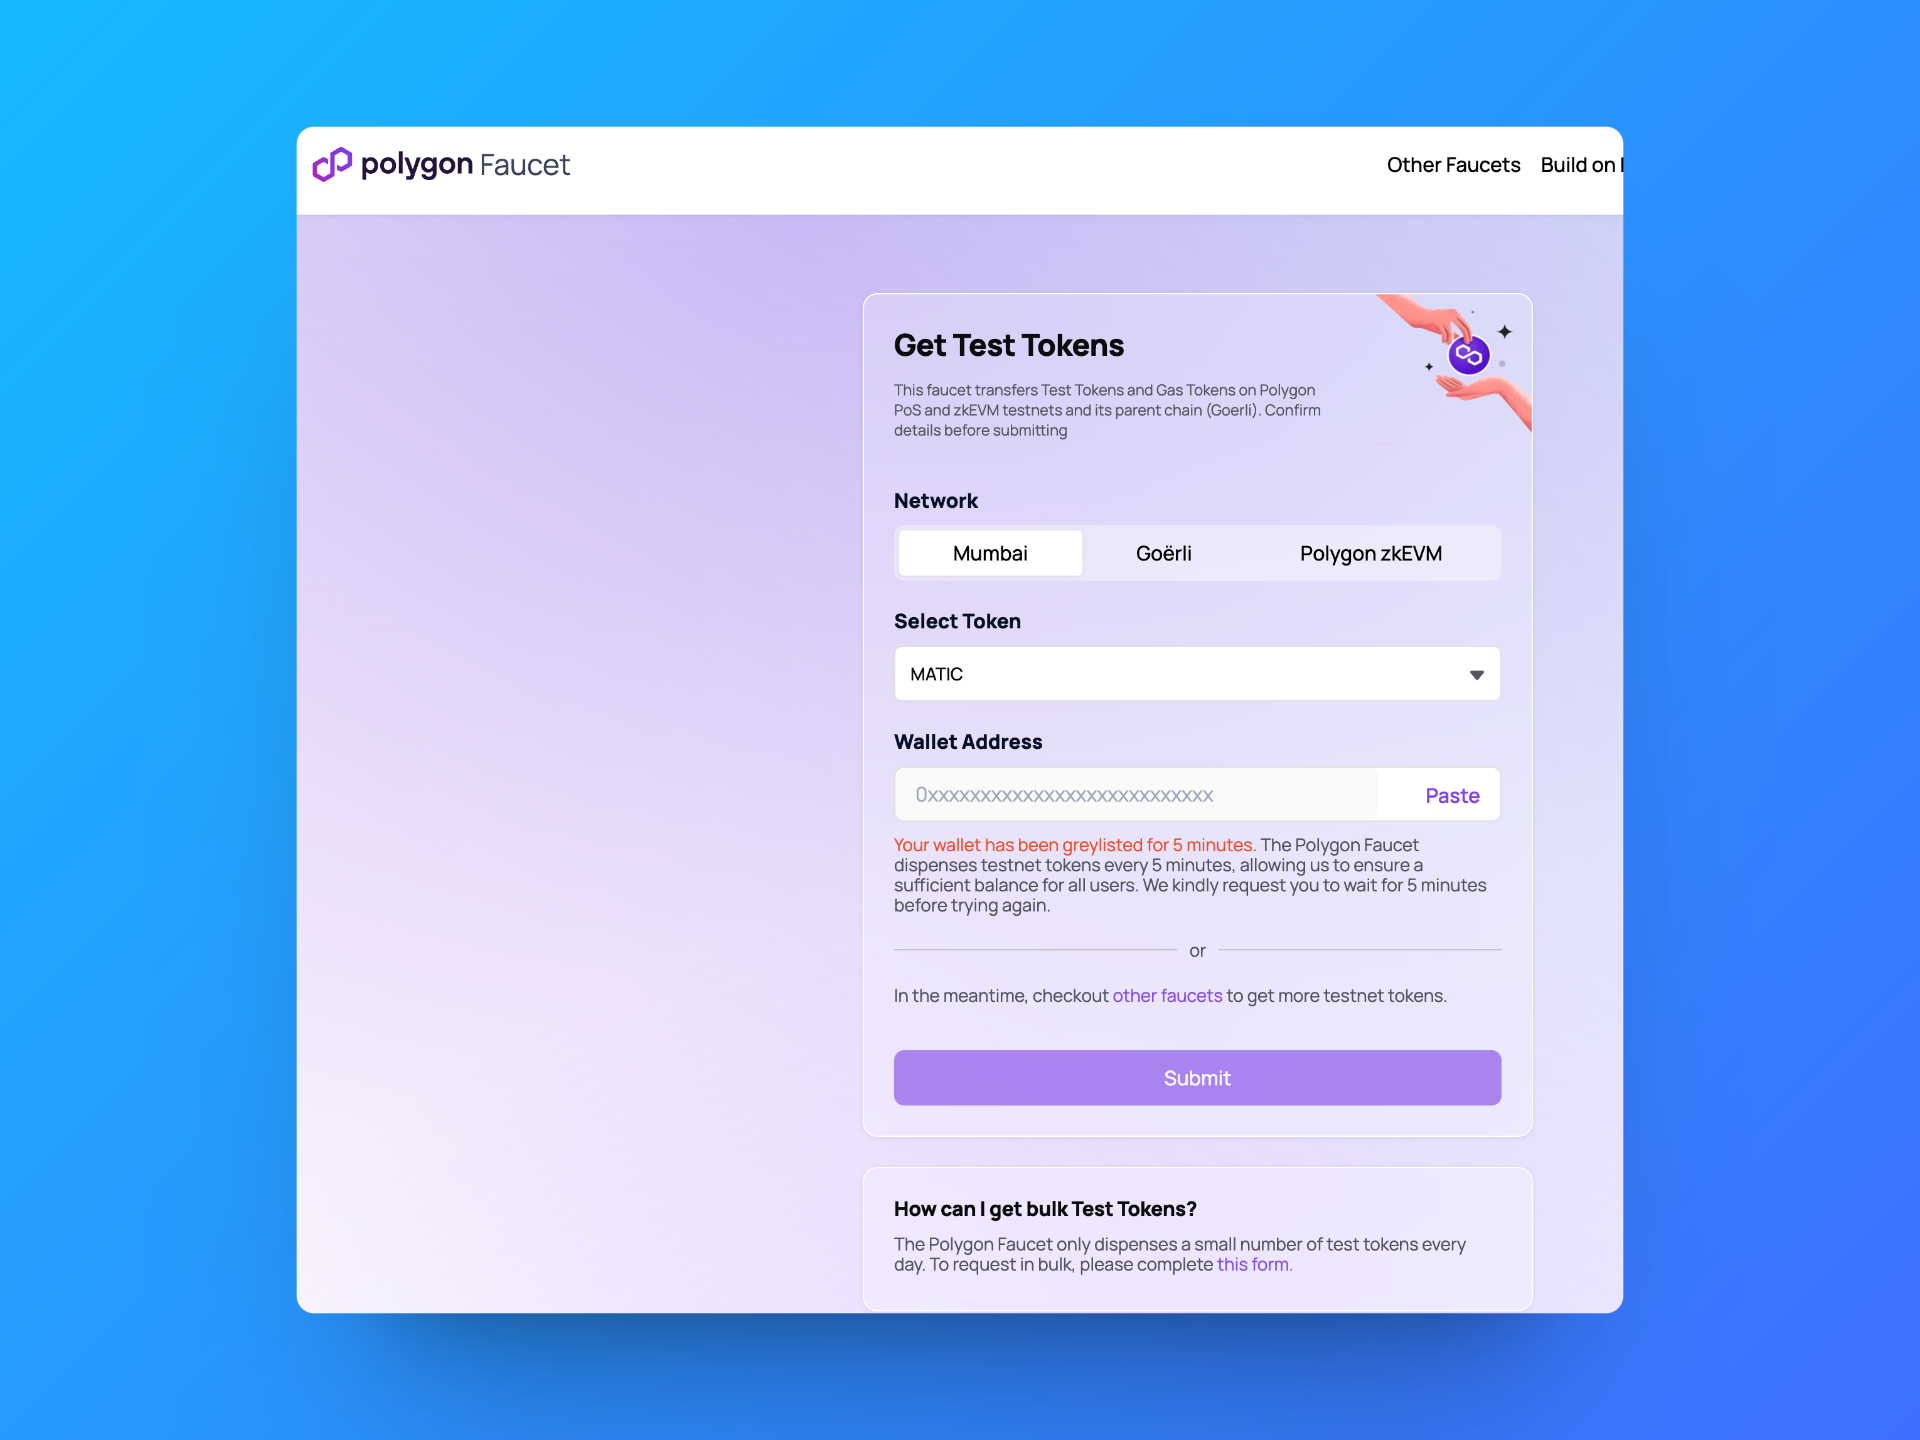
Insert your Wallet Address and click the Submit button. Depending on faucet traffic, you may have to perform some validation that you are a human.
You can confirm that you have received the test tokens by going to the Balances section of your Private Keys.
Image Here of the Dashboard
Deploying the Smart Contract
We are now ready to create and deploy a smart contract. Go to the Smart Contract Sets on the dashboard on the right. From there, select Add a Smart Contract Set and the TokenSender node that you have created.
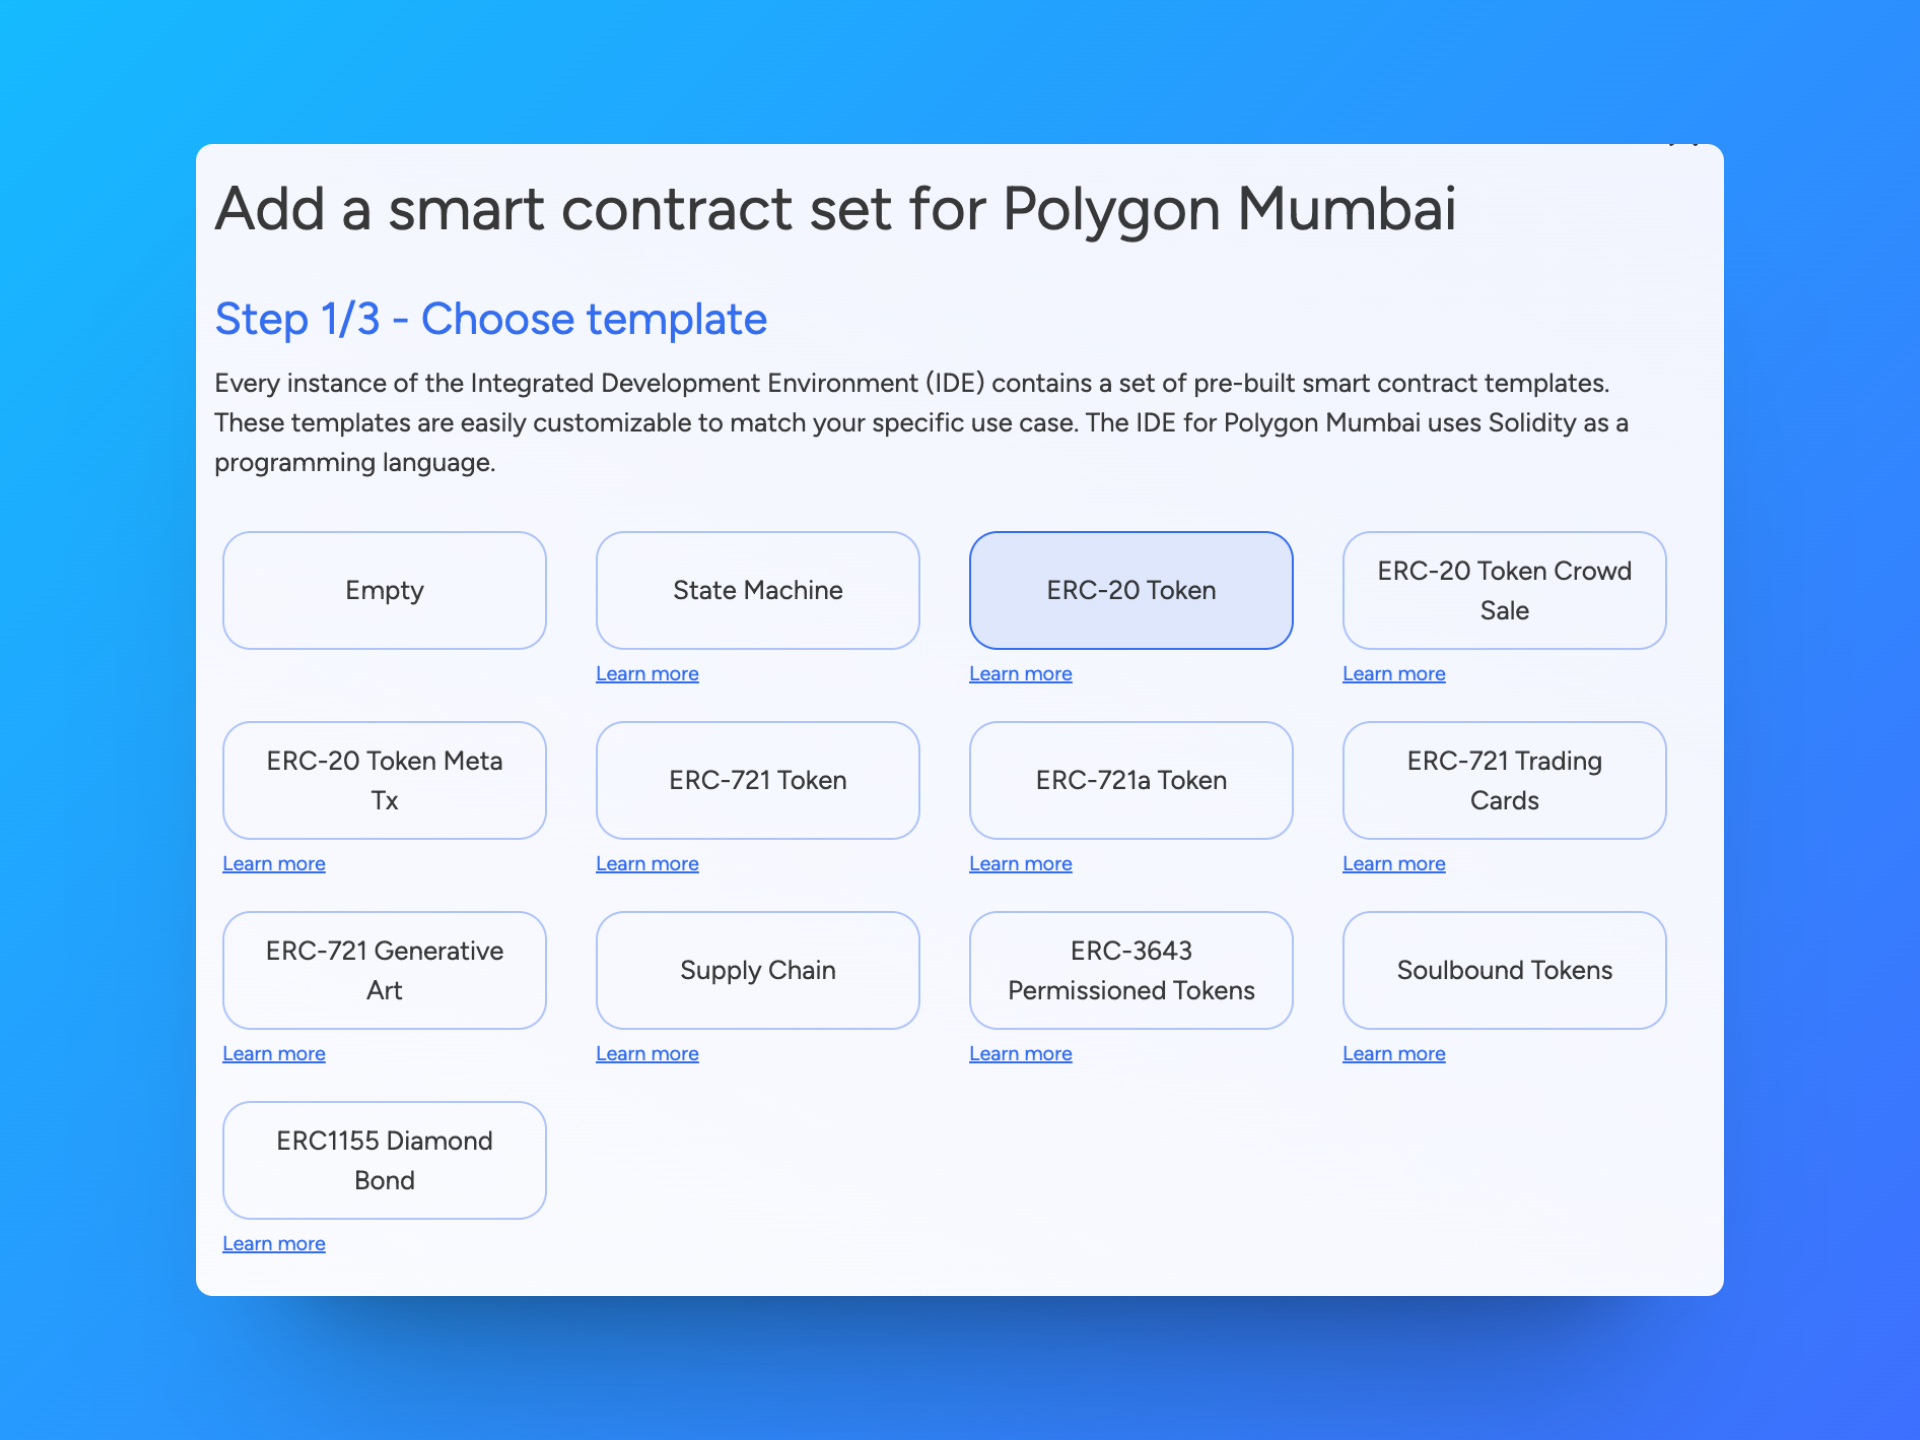
You now have the option to select a smart contract template. These are pre-populated smart contracts of popular ERC standards and use cases.
For this guide, we will use the ERC-20 Token template:
You can continue to use the naming and deployment plan that you used earlier for the other resources.
Editing the Contract
Once that is deployed, we can go to the IDE and start editing our contract.
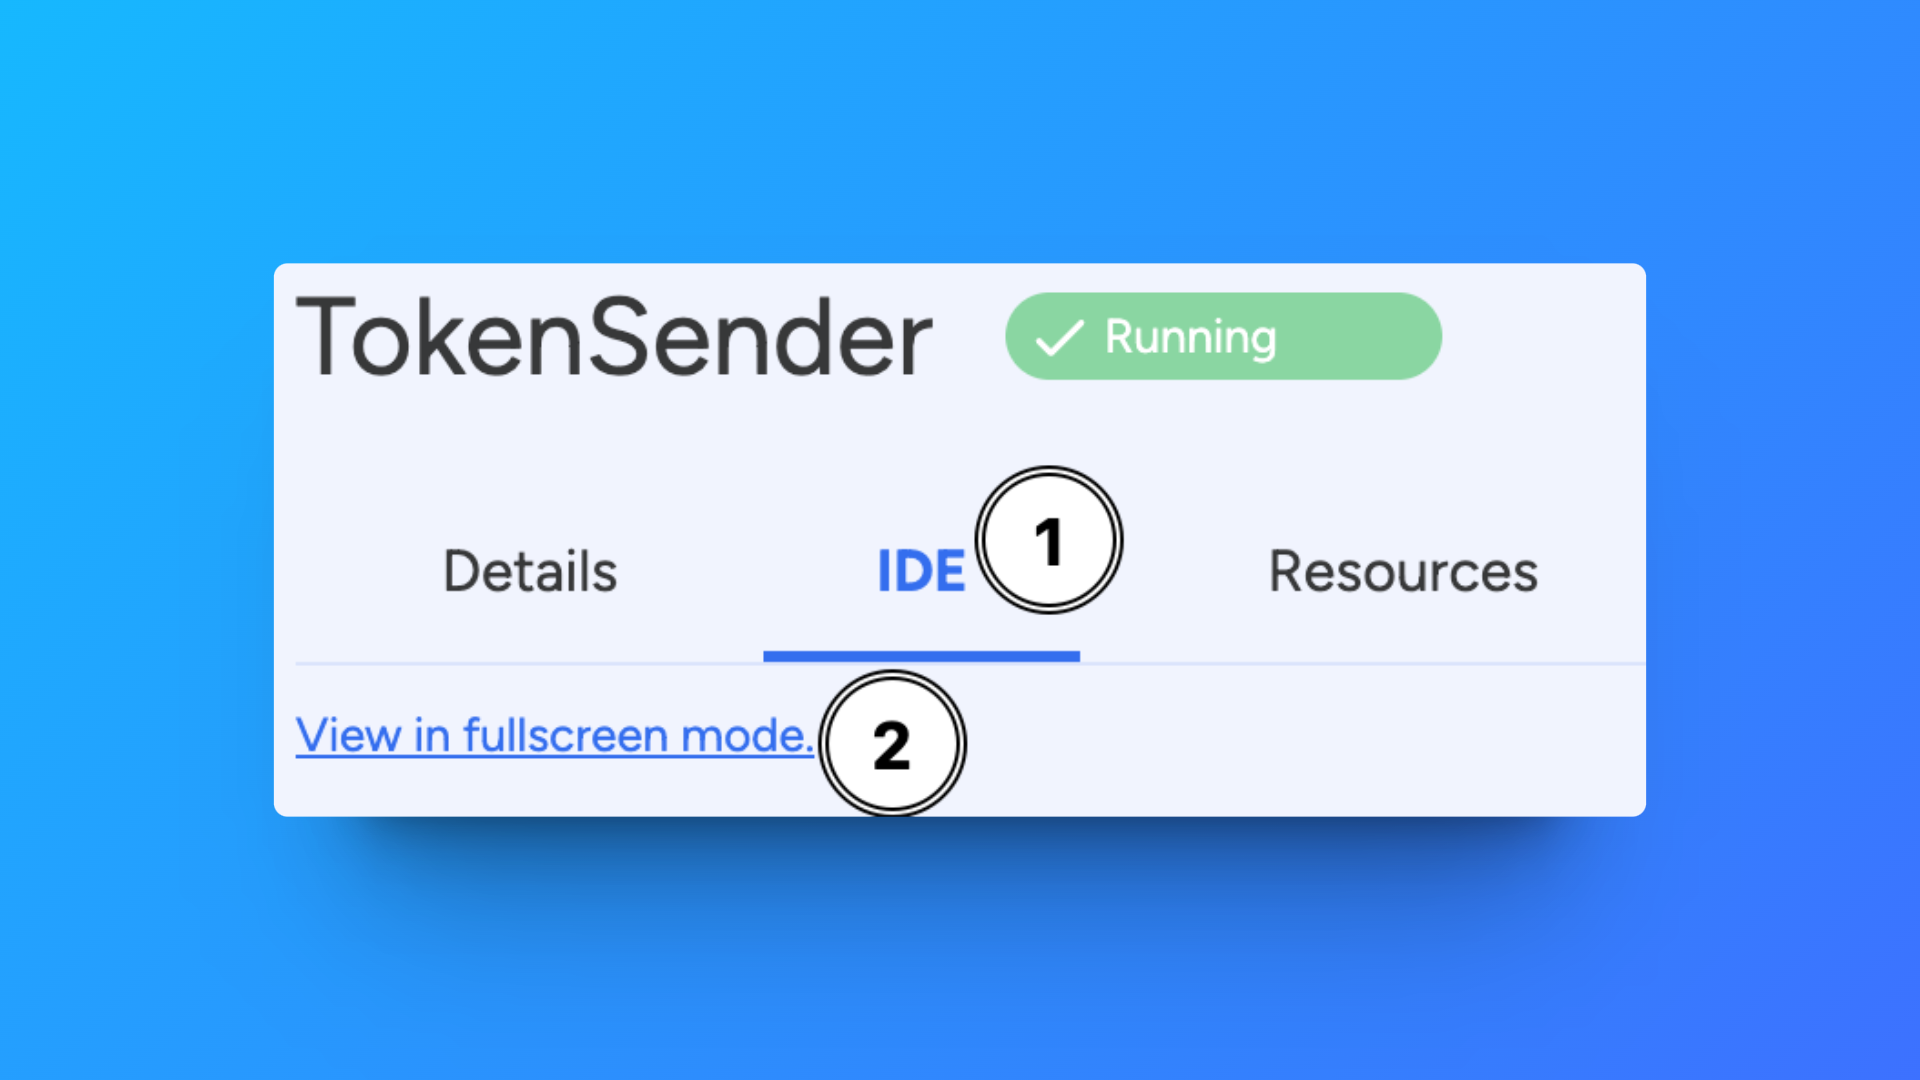
You can find the ERC20 contract on the left in the Explorer under contracts/GenericERC20.sol
We don't need to change anything in this contract's code. The current default is to deploy a token called GenericToken with a symbol GT.
To change this to something less generic, we can go to the ignition/modules folder and open the main.ts file. From there we can edit the below code block that starts on line 4:
Before:
const counter = m.contract("GenericERC20", ["GenericERC20", "GT"]);
By editing this code block, you can create your token name and symbol:
After:
const counter = m.contract("GenericERC20", ["DocumentationToken", "DT"]);
Compile and Deploy the Contract
After making the changes, we can compile our contract code. This is done by selecting the Task Manager option on the left side.
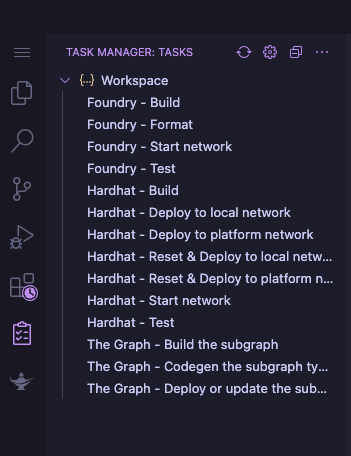
- Select the
Task Manageron the left - Compile the contract by selecting
Hardhat - Build - Deploy the contract by selecting
Hardhat - Deploy to platform network
If the deployment was successful, you will see a deployed at 0x4251501F80cE773b594C0B6CEf1289b97b0
Part 2: Building the Frontend
Now that we have a deployed contract, let's build a front end to start interacting with it.
Cloning the Template
To save some time for you, we have created a template that can be found here. Clone this repository to get started.
Installing the Dependencies
In addition to using NextJS, this template uses the:
wagmi- to interact with the contractweb3auth- to create a modal for connecting a wallettailwind- for styling and designconnectkit- connecting a wallet to your dApp
You can get all of these packages by running bun install in your terminal after cloning the repo.
After that is completed, open the folder in your favorite code editor.
Adding the ABI
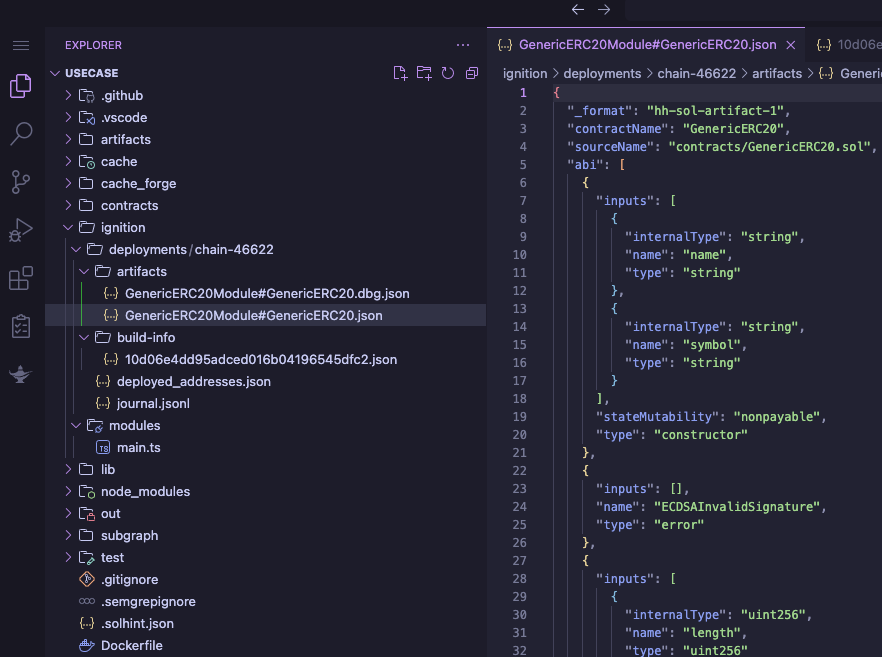
The first thing we will do is add the ABI and address of our deployed contract. This allows our front end to know where to read and write data to it. This information can be found in the SettleMint IDE where you deployed your contract.
Go to the ignition/deployments/chain-46622/artifacts folder in the file explorer and copy the GenericERC20Module#GenericERC20.json file to the contractData directory.
Adding the API Key
For security reasons, we don't want just anyone accessing your node. So you will also need to generate an API key to get access.
This is done by navigating to your profile in the top right next to the grid icon. From there, select API Keys:
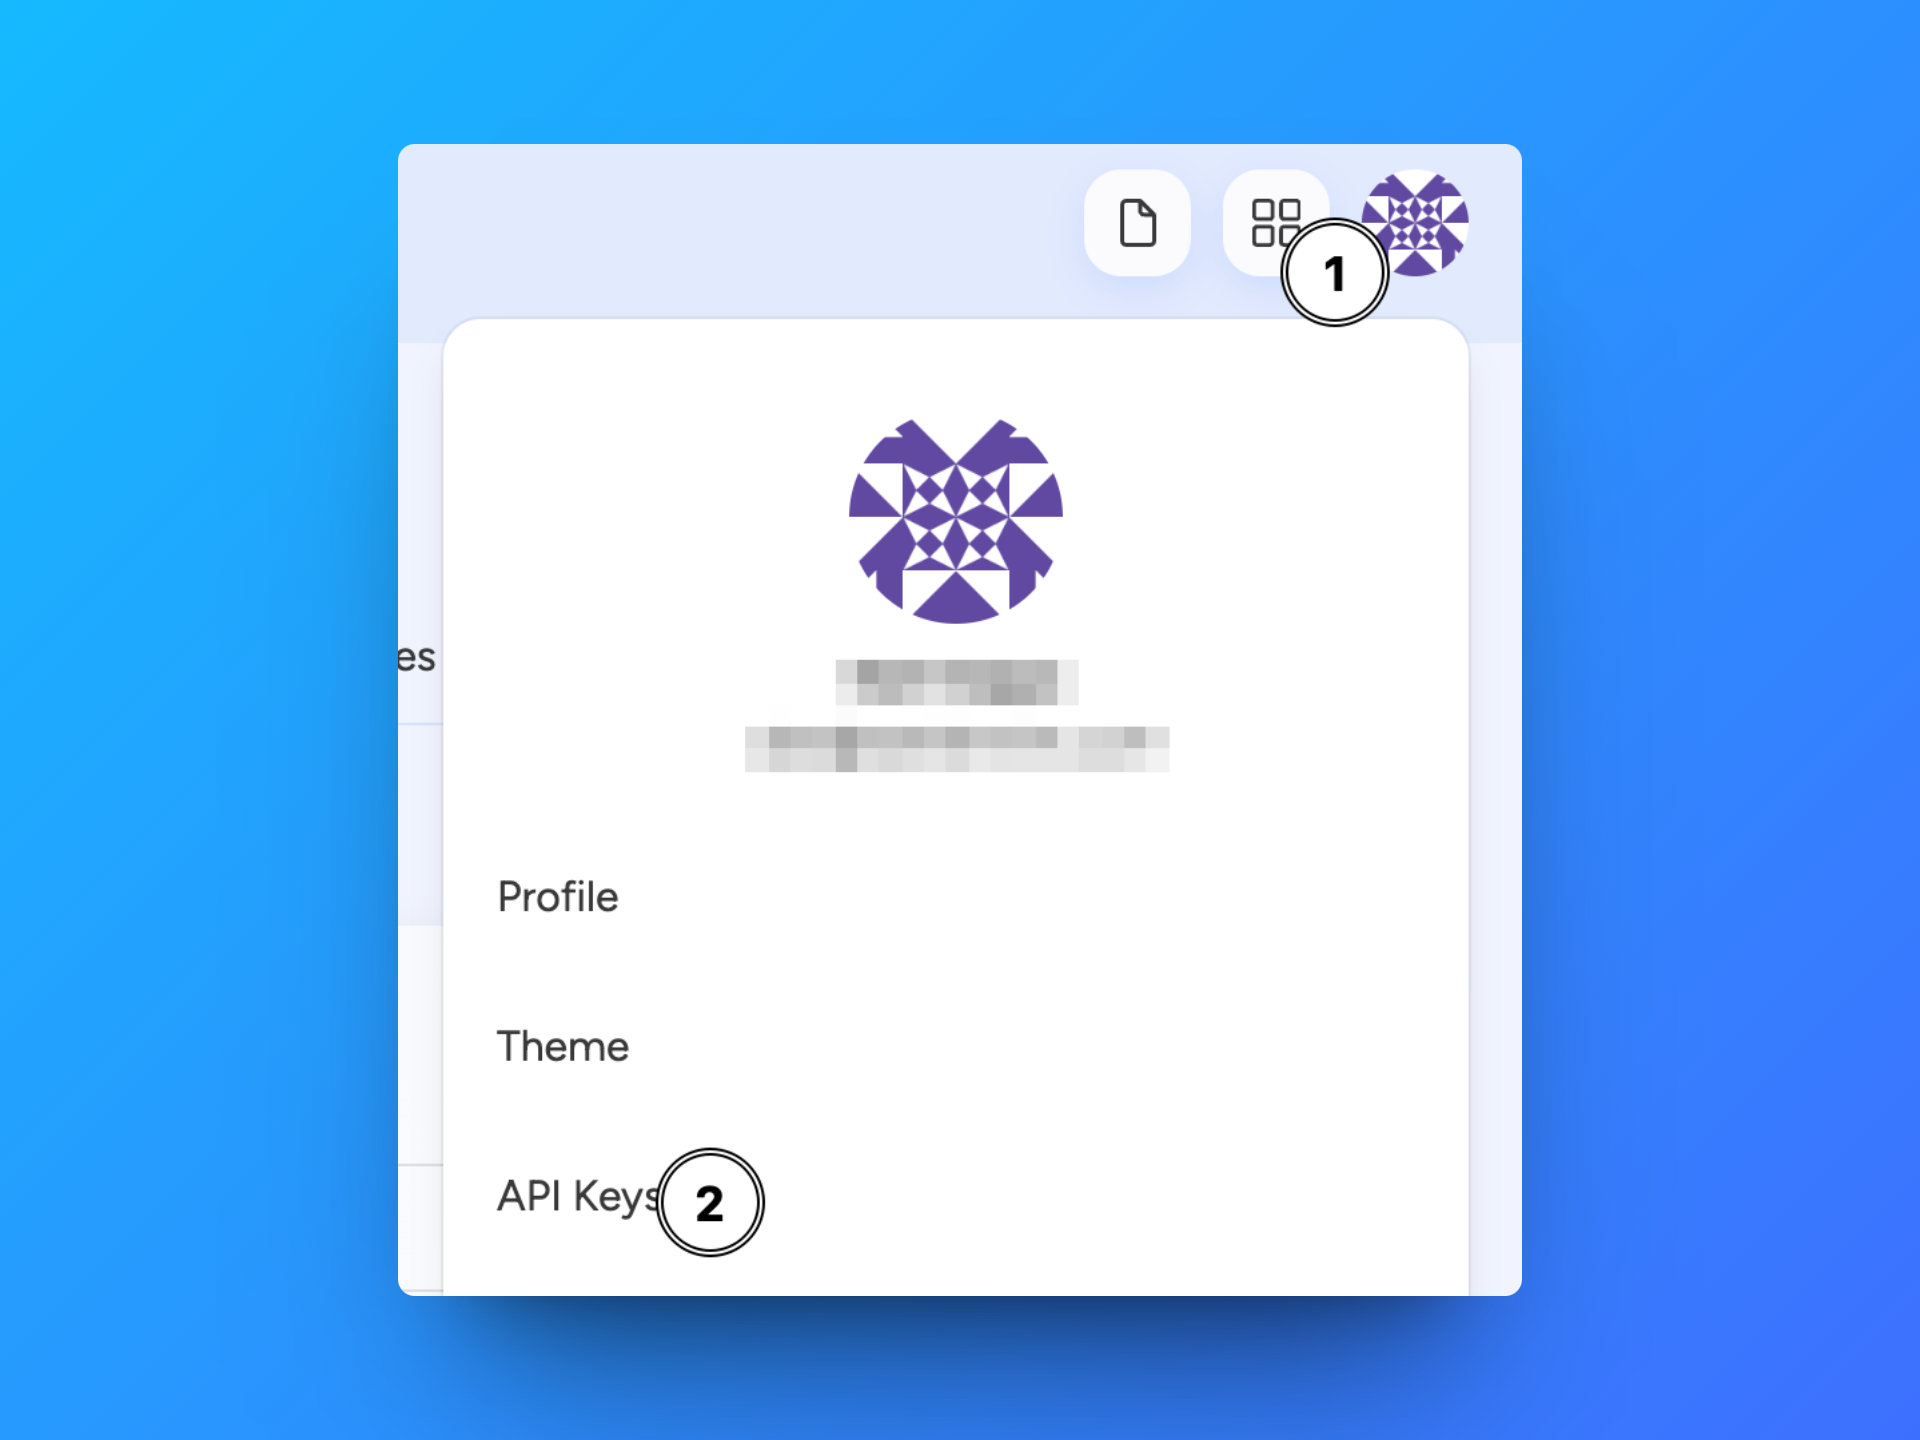
From there, select the Generate new API Key. You can now create an API key name, expiration, and access. For this guide, selecting All blockchain nodes in all organizations and All middlewares in all organizations will work.
You will now see your API key that was generated only once. Copy this and add it as the BTP_TOKEN variable value in the .env file.
Configuring web3auth
To use web3auth, you will need to make an account a project. To set up an account and a project, follow this guide.
After creating an account, you can create a new project. From there you will see that the project has been created and you can access the Project Details page.
On that page, you will find the Project ID like below:

Copy your Project ID and add it as the NEXT_PUBLIC_WALLETCONNECT_PROJECT_ID variable value in the .env file.
Adding environment variables
Open the .env file and add the remaining environment variables BLOCKCHAIN_NODE, NEXT_PUBLIC_CONTRACT_ADDRESS and PORTAL_URL.
# Base url of the application, used for SSR
NEXT_PUBLIC_SERVER_URL=http://localhost:3000

# API token
BTP_TOKEN=sm_pat_...

# Web3Modal - WalletConnect
NEXT_PUBLIC_WALLETCONNECT_PROJECT_ID=...

# Wagmi
# To get this URL go to the SettleMint platform and select the `Blockhain Nodes` option on the right.
# From there, select your deployed node and choose the `Connect` tab.
# Here you will find your `JSON-RPC` URL.
BLOCKCHAIN_NODE=https://blockchain-node.settlemint.com/

# Contracts
# To get this open the IDE of the deployed Smart Contract Set on the SettleMint platform.
# Open the `ignition/deployments/chain-46622/deployed_addresses.json` json file and copy the address.
NEXT_PUBLIC_CONTRACT_ADDRESS=0x...

# Portal
# To get this URL go to the SettleMint platform and select the `Middlewares` option on the right.
# From there, select your deployed smart contract portal middleware and choose the `Connect` tab.
# Copy the base url (without the `/graphql` or `/api` part).
PORTAL_URL=https://smart-contract-portal-middleware.settlemint.com
Part 3: Running the Application
Now it's time to see what we have made. To get your application running, run the following command in your terminal:
bun dev
This will start your application locally on localhost:3000. Go to that address and you will now see the frontend using NextJS:
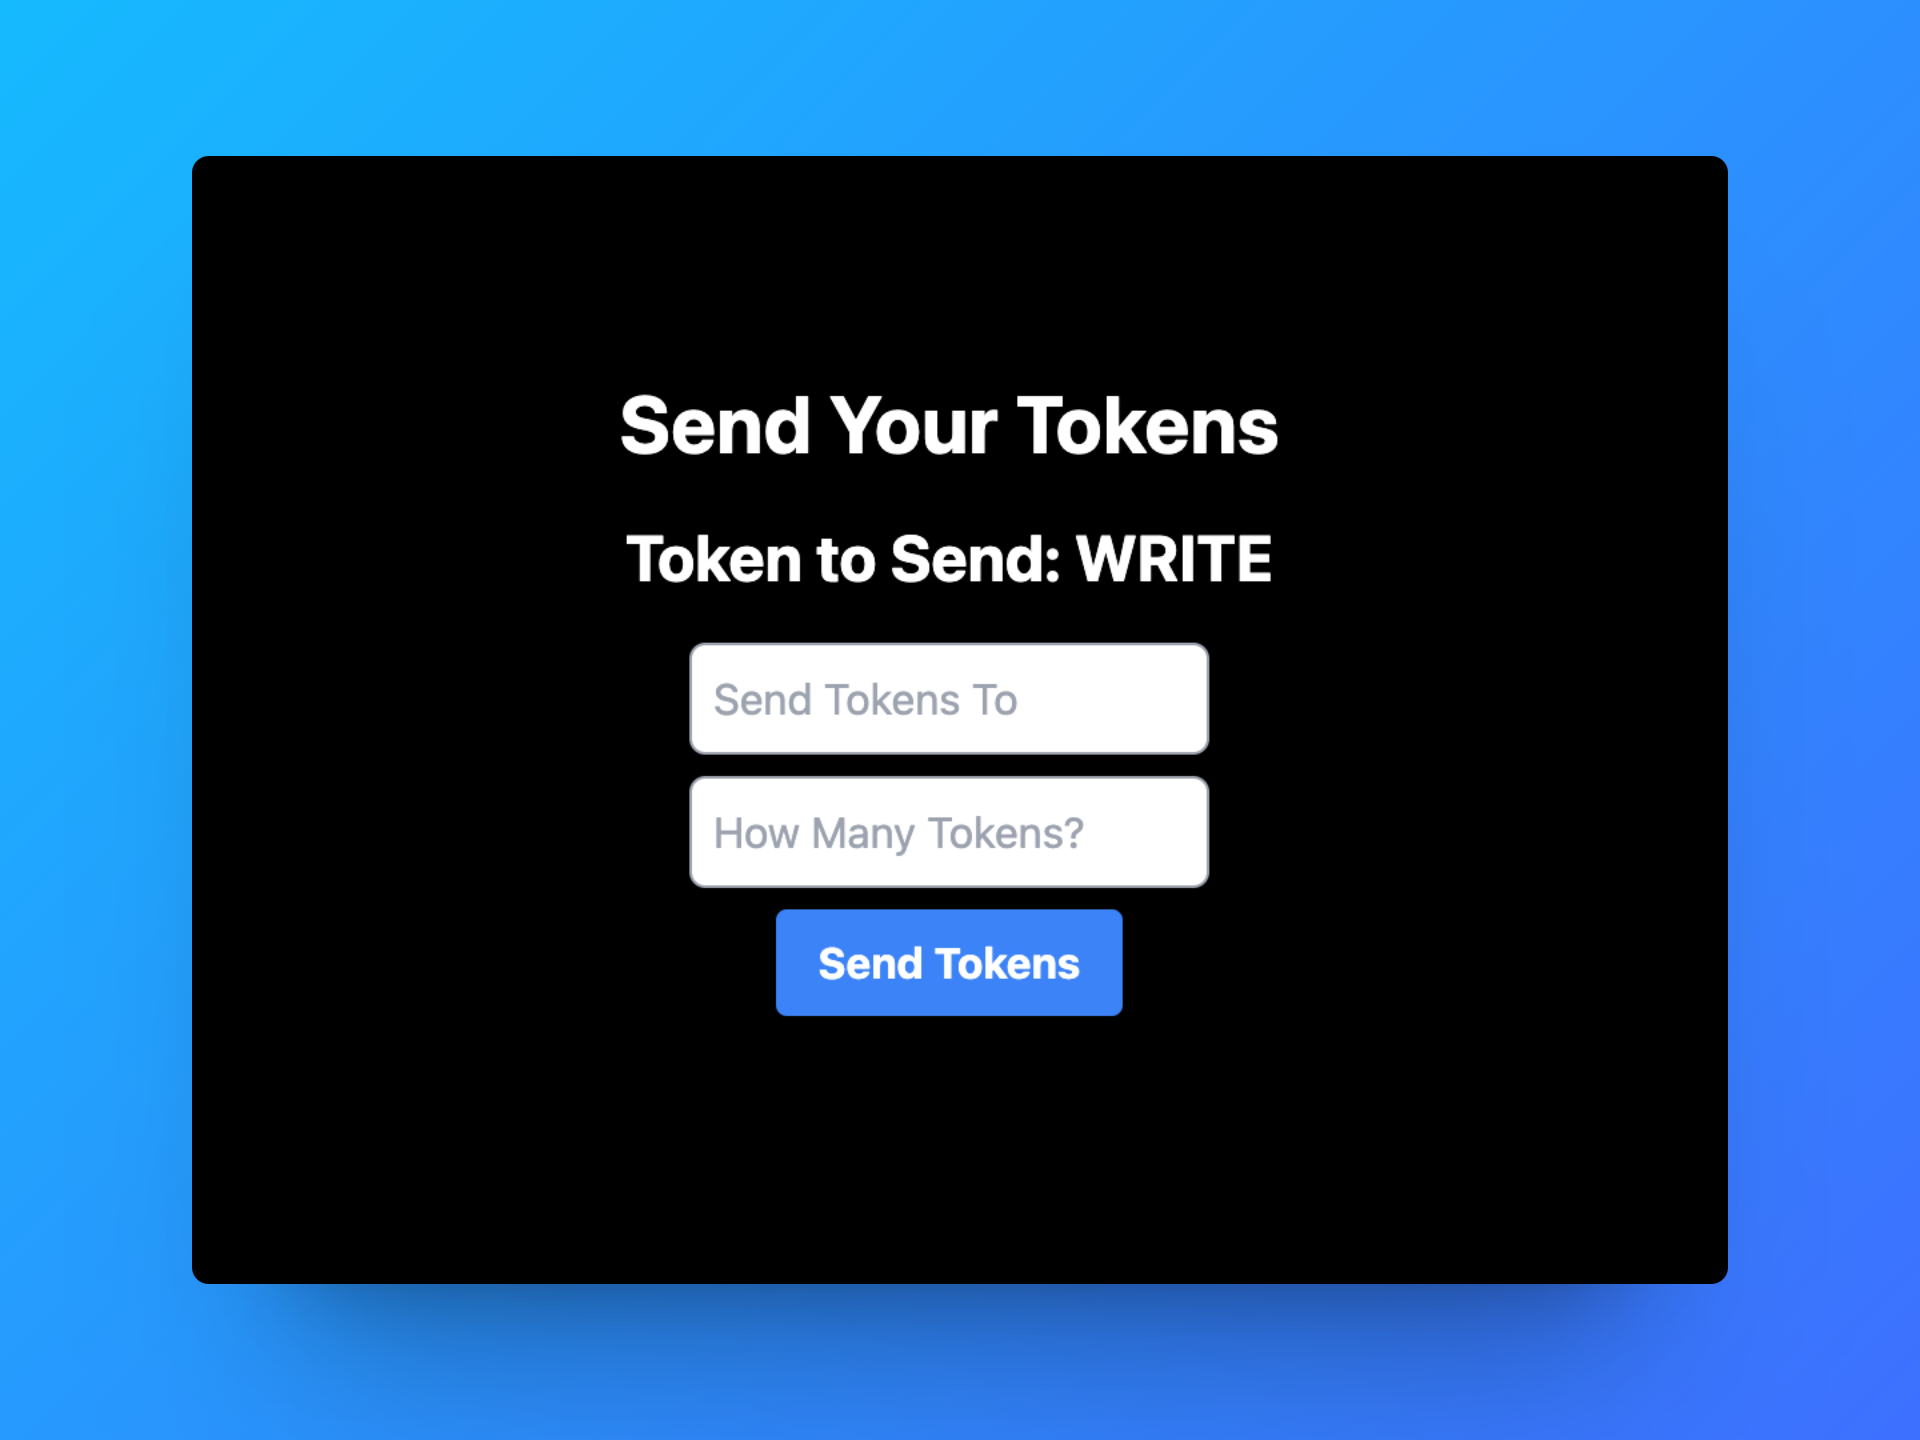
Using the Smart Contract Portal Middleware enables us to read different functions and values from our smart contract. In this template, we are reading the symbol function to display which token is connected to this smart contract.
This is done in this code block in page.tsx
const { data } = useSuspenseQuery({
  queryKey: ["symbol"],
  queryFn: async () => {
    const response = await portal.GET("/api/generic-erc-20/{address}/symbol", {
      params: { path: { address } },
      parseAs: "text",
    });
    return response.data;
  },
});
Setting Up Metamask
To send some tokens that we just created, we need to add our private key to our Metamask wallet. You can retrieve your private key from the Private Keys section on SettleMint. This is the same location where we got the address earlier.
Copy your private key and open up your Metamask Extension. From there, select whatever account name is at the top of the window. Then scroll down until you see the Import Account option.
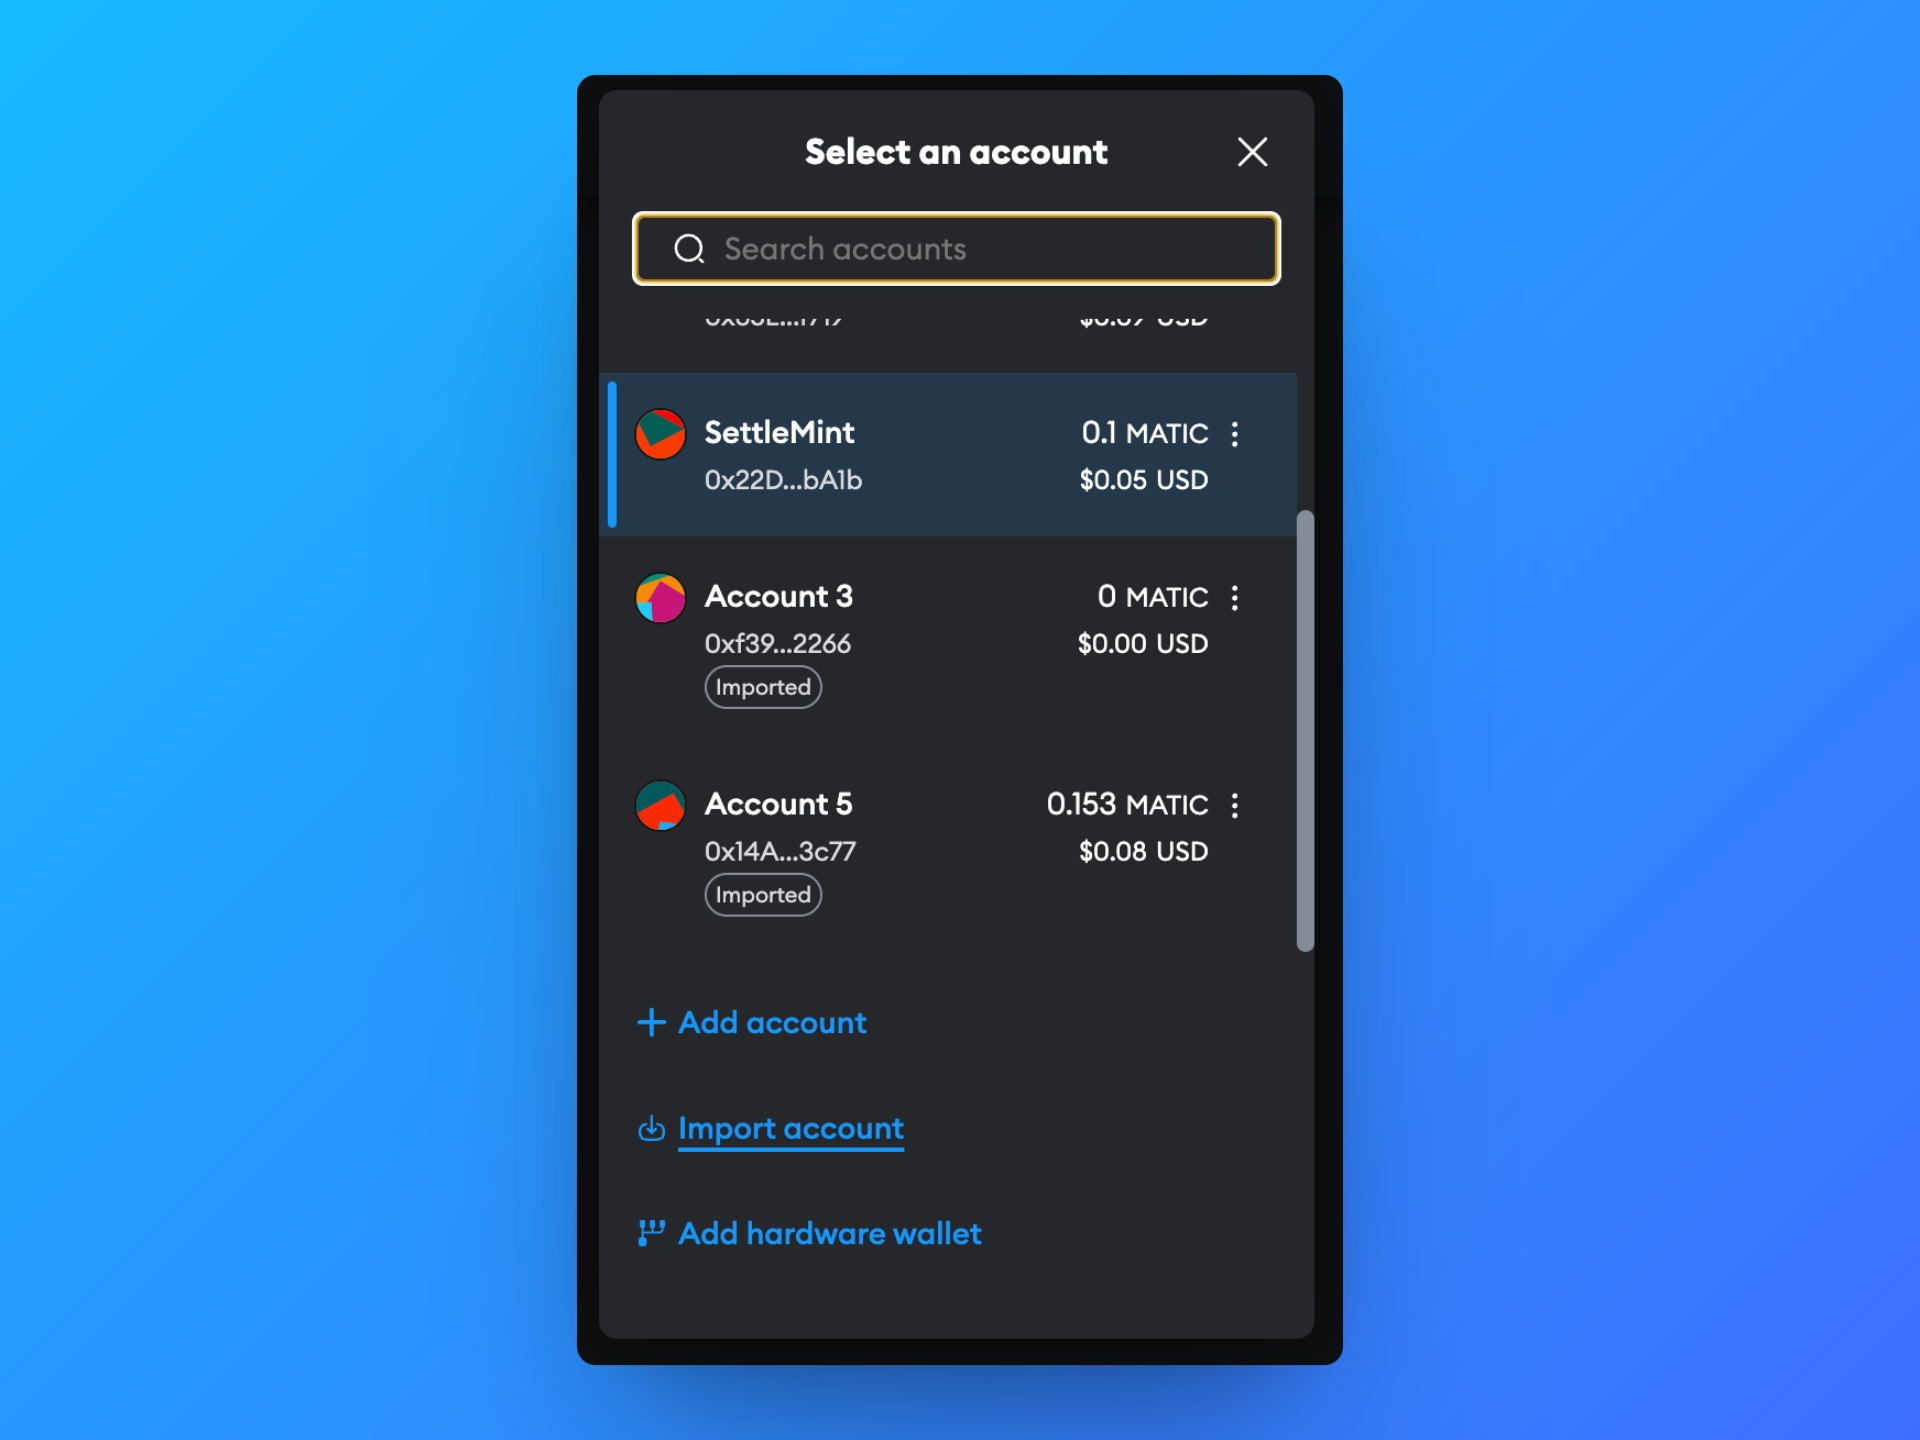
Select that option and paste into your private key. You now have access via Metamask to perform transactions from this account.
Sending the Tokens
We are now ready to perform our first transaction from the front end.
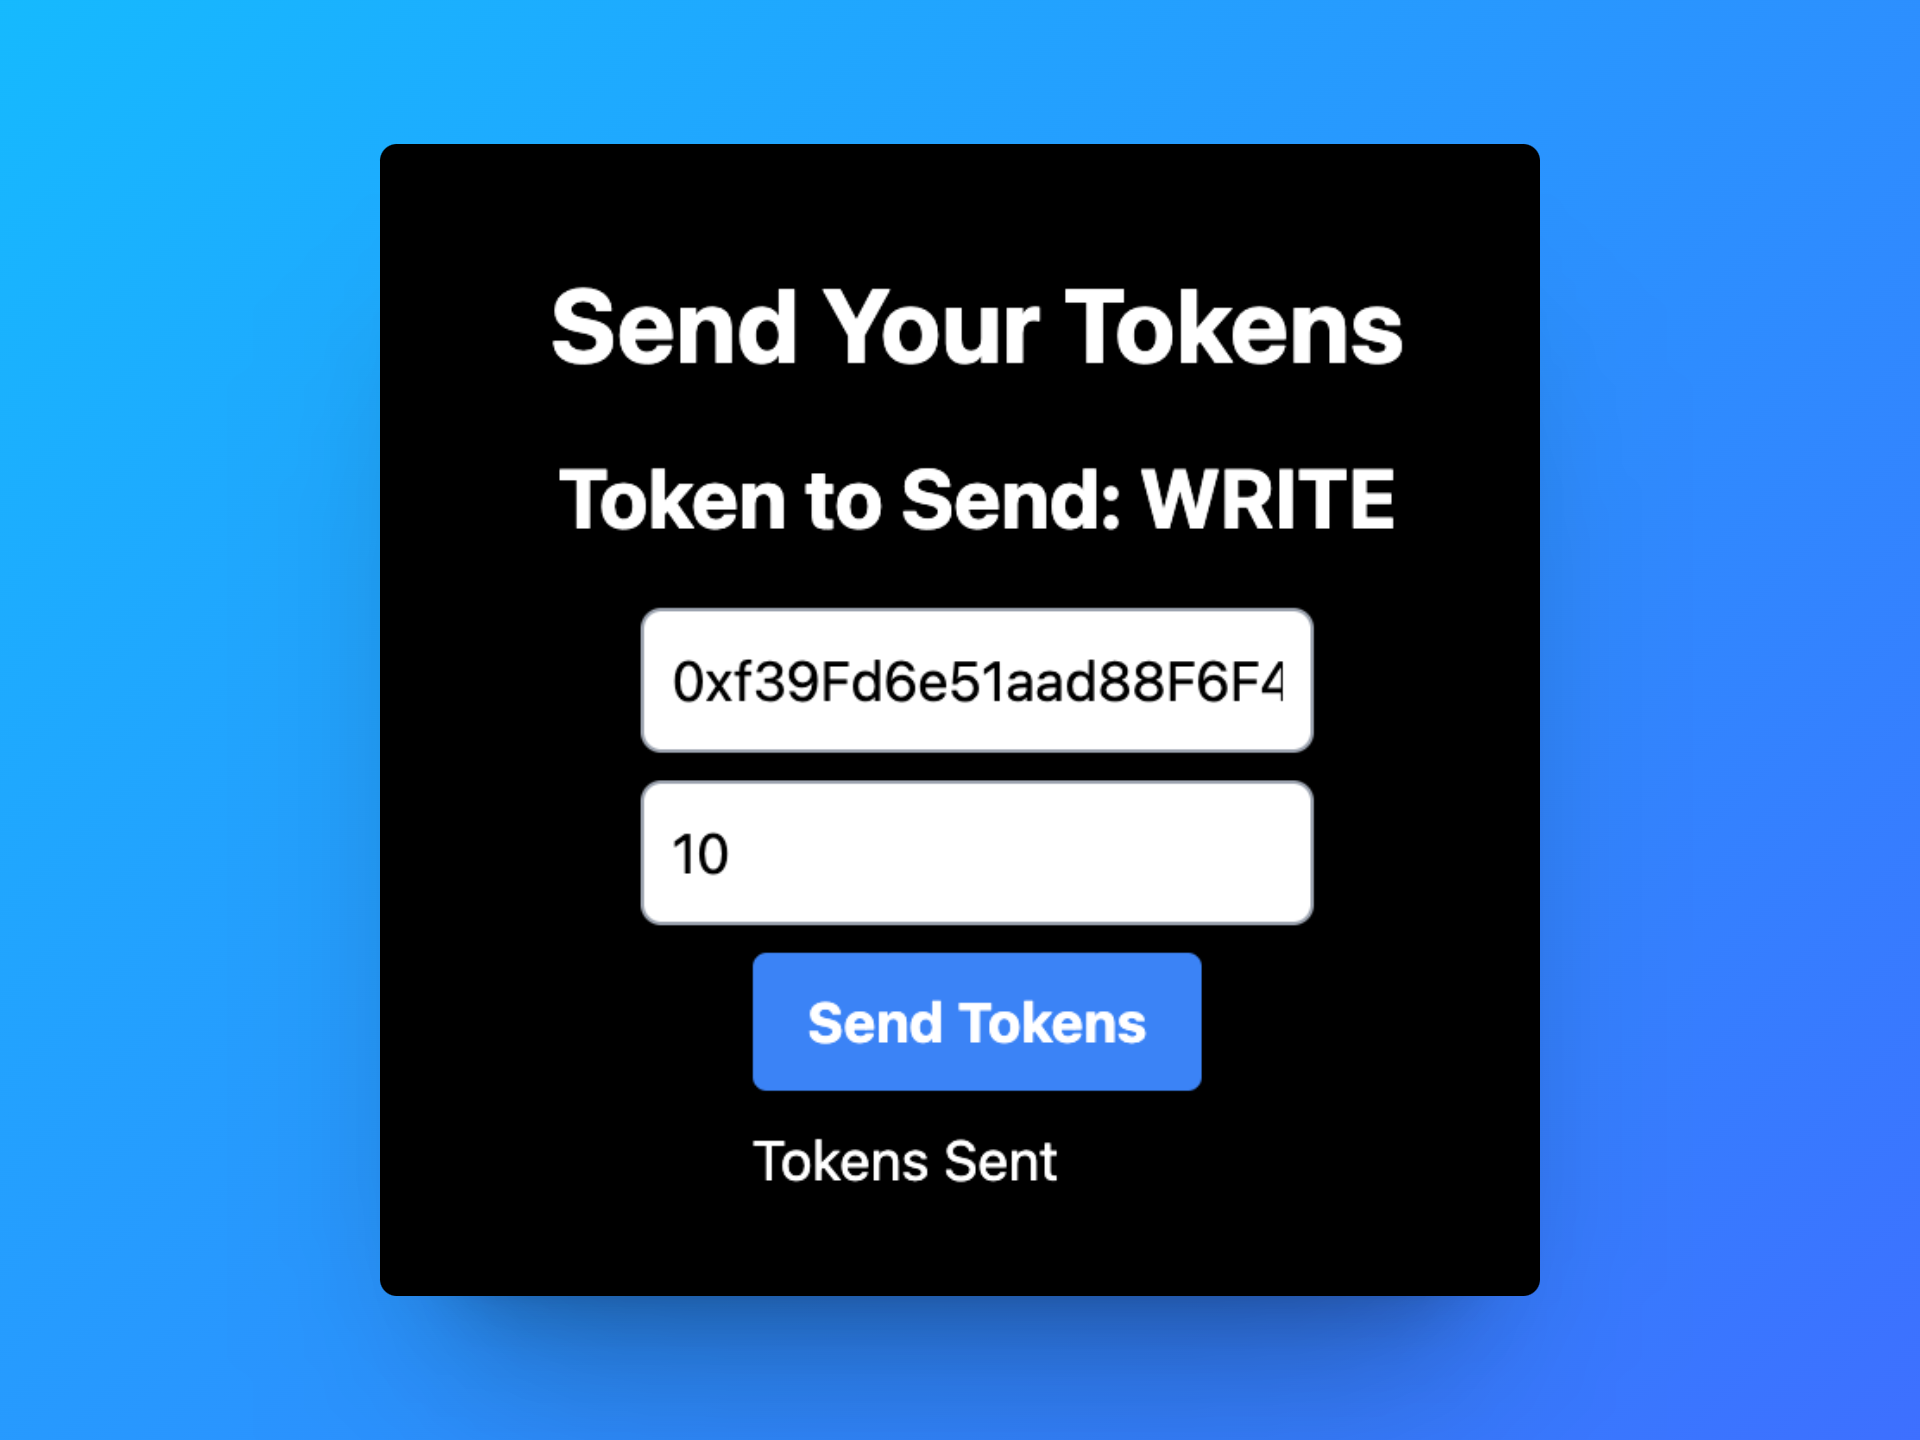
In the first input box, insert any wallet address. It is good if you have access to that wallet to confirm that the transaction was sent.
In the second input box, insert the number of tokens you would like to send to the address.
Then click the Send Tokens button.
Your Metamask should now open up for you to sign the transaction. If not, make sure you have the correct wallet selected in Metamask before trying the transaction.
After clicking Confirm, you will see a Tokens Sent confirmation on your front end:
Congrats! You will now see the transaction confirmed in your Metamask activity.
Next Steps
Now that you have built your custom frontend, you can now explore more smart contract use cases you can build on SettleMint!