Middleware
For any dApp to provide good UX, you need a solution that quickly loads the data stored on chain and on IPFS. Querying data directly from blockchain is complex. This is where the middleware comes in, which is essentially a layer in between blockchain and your dApp, allowing you to index and query your blockchain data easily and efficiently.
SettleMint offers two Middleware solutions: The Graph Middleware (for all EVM-compatible chains) and Smart Contract Portal Middleware.
Adding a middleware
Before adding a middleware make sure that you have installed smart contract sets and IPFS (decentralized) storage
Navigate to the application where you want to add a middleware. Click Middleware in the left navigation, and then click Add a middleware. This opens a form.
Follow these steps to add the middleware:
- Select to which of your smart contract sets the middleware needs to connect, and click Continue.
- Choose Graph Middleware or Smart Contract Portal Middleware
- Choose a Middleware name. Choose one that will be easily recognizable in your dashboards.
- Select the storage provider
- Choose a deployment plan. Select the type, cloud provider, region and resource pack. More about deployment plans.
- You see the resource cost for this middleware displayed at the bottom of the form. Click Confirm to add the smart contract set.
When the middleware is deployed, click it from the list and start using it.
The Graph Middleware
The Graph is a protocol for indexing and querying blockchain data from networks. It can be used with all EVM-compatible chains like Ethereum, Hyperledger Besu, Polygon, Binance Smart Chain, Avalanche, etc. You can run it on your own blockchain nodes (both public and permissioned) and IPFS nodes.
Using the Graph protocol, you can create subgraphs that define which blockchain data will be indexed. These subgraphs are defined in the smart contract set and deployed to the middleware. The middleware will then use these subgraphs to correctly index your smart contracts and expose a developer-friendly and efficient GraphQL API, allowing you to query the data you need.
The middleware is fully preconfigured and integrated with the smart contract sets. We have some prebuild subgraph indexing modules, but you can build your own modules if you have a custom smart contract set.
Before you start, make sure you are running:
- An EVM-compatible network (Ethereum, Polygon, Hyperleder Besu, Binance Smart Chain, Avalanche, etc.)
- A smart contract set with a deployed smart contract
- An IPFS node
- A private key
When the middleware is deployed, follow these steps to start using it:
Define and deploy a subgraph
Navigate to the smart contract set that you connected to the middleware, go the details and open the IDE. Here you will define the subgraph to set the indexing specifications, and deploy it so it can be loaded into the middleware.
Subgraph raw configuration
Inside the root you will find a file called subgraph.config.template.json that contains the raw configuration of the subgraph. The important section is the datasources section.
- Name - here we defined the smart contracts with their name (the name of the artifact created in the 'deployments' folder when running the deploy task)
- Address & Startblock - You will notice the startblock and address to be 0. These will be filled in using the
graph:configtask based on the hardhat deployments. - Module - In the modules array all the indexing modules to activate for this smart contract.
About the indexing modules
We provide two libraries of indexing modules: one by the OpenZeppelin team for all the common smart contracts in their smart contract library, and one by the SettleMint team to extend the capabilities of the OpenZeppelin one, and to provide indexing of the specific SettleMint smart contract sets.
The OpenZeppelin set contains the following indexing modules:
- accesscontrol
- erc1155
- erc1967upgrade
- erc20
- erc721
- governor
- ownable
- pausable
- timelock
- voting
The SettleMint set contains the following indexing modules:
- erc721ipfs: to extend the ERC-721 from OpenZeppelin to index IPFS metadata of your ERC-721 tokens
- crowdsale/vestingvault/vestingwallet: to index and expose all the data for the crowdsale contract set
- forwarder: for the ERC-20 Meta transactions forwarder data
- statemachinemetadata: to index IPFS metadata for state machines
These are available in the subgraph folder in your IDE. You can create your own modules for any other data you want to index, or for custom smart contracts not part of the default sets. And you can modify the existing ones if you want to index things a bit different.
Write your own indexing module
You can also write your own custom indexing module for smart contracts that are not part of the default sets.
Follow these steps to create a custom indexing module:
- Primitives to generate a GraphQL schema:
subgraph/datasource/x.gql.json- In order to allow composability, the schema are not defined in the GraphQL format but rather in a dedicated JSON format which is can be assembled and compiled to GraphQL. - Template to generate a subgraph manifest:
subgraph/datasource/x.yaml- This file lists all the events that the datasources should listen to, and links that to the corresponding indexing logic. - Indexing logic:
subgraph/datasources/x.tsand (optionally)subgraph/fetch/x.ts- This is the core logic that processes the events and to index the onchain activity.
To learn more, check it out on Github.
Tweak the subgraph configuration
You can tweak the subgraph.config.template.json file to your liking, and run the graph:config task. This will generate subgraph.config.json for the next steps.
The following tasks need to be run in this sequence:
graph:compile- Usessubgraph.config.jsonto generate the GraphQL schema and subgraph configuration.graph:codegen- Generates the AssemblyScript types for your contracts ABI based on the output ofgraph:compile.graph:build- Compiles the WASM files based on the outputs generated bygraph:codegen.graph:deploy- Deploys the WASM files to IPFS and updates the middleware to start or update the indexing.
To make this a bit easier, the graph:all task executes all these steps in the right order.
The indexing of your smart contracts has now started. This can take a while, but once done you can query the middleware for your data in seconds using the GraphQL API. You can find the endpoint in the Connect-tab.
The Smart Contract Portal Middleware
The Smart Contract Portal is a middleware which creates an easy to use api on top of your smart contracts. It can be used with all EVM-compatible chains like Ethereum, Hyperledger Besu, Polygon, Binance Smart Chain, Avalanche, etc. You can run it on your own blockchain nodes (both public and permissioned) or on a Load Balancer.
Benefits of using the smart contract portal:
- Simplified Integration: APIs allow developers to interact with complex smart contract functions through familiar interfaces, reducing the need to understand blockchain-specific languages and protocols.
- Data Aggregation: APIs can consolidate data from multiple smart contracts, providing a unified view.
- Improved Performance: GraphQL optimizes data fetching, ensuring that clients retrieve only the necessary data in a single request, reducing network load and improving performance.
- Stack agnostic: Teams are free to choose their own technology stack.
Before you start, make sure you are running:
- An EVM-compatible network (Ethereum, Polygon, Hyperleder Besu, Binance Smart Chain, Avalanche, etc.)
- A private key
Upload an ABI
A smart contract ABI (Application Binary Interface) is a standardized way for interacting with smart contracts in the Ethereum blockchain and other compatible systems. It serves as the bridge between human-readable contract code (written in languages like Solidity) and the Ethereum Virtual Machine (EVM), which executes the contract. The ABI specifies the functions that can be called on the contract, including their names, input parameters, and output types.
When deploying a smart contract the ABI file can be found as part of the artificats. See Deploying the Smart Contract. Download the ABI json files and save them on your local filesystem.
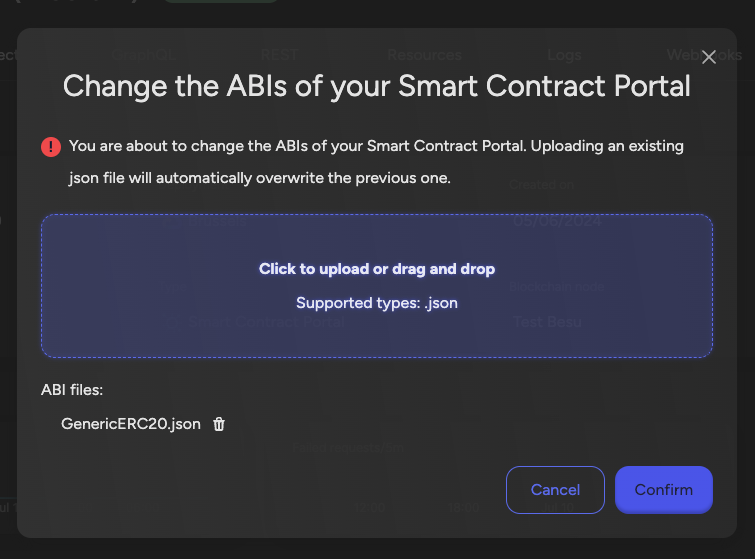
When creating a new middleware you'll need to upload at least one ABI.
To update the ABIs of an existing smart contract portal middleware navigate to the middleware, go the details and click on the 'Manage Middleware' button on the top right. Click on the 'Update ABIs' item and a dialog will open. In this dialog upload the ABI file(s) you saved on your local filesystem in the previous step.
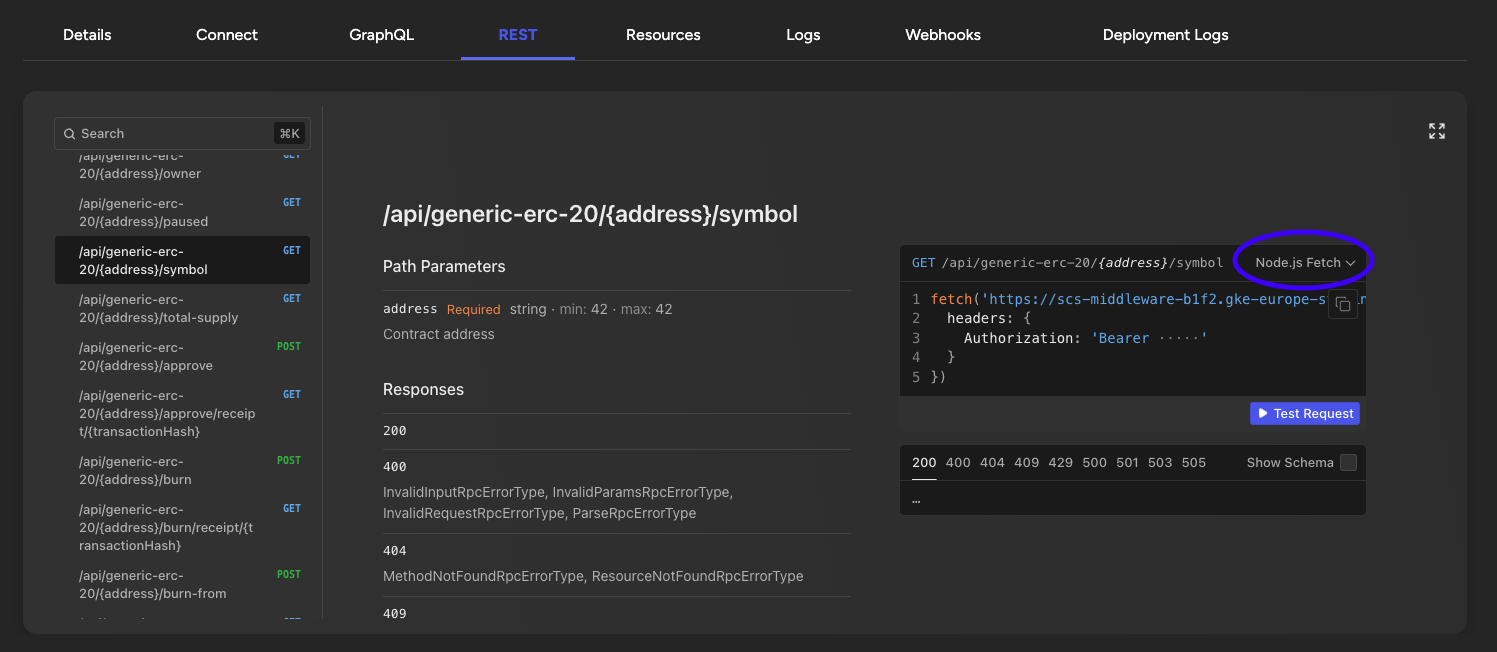
REST
A fully typed REST api with documentation is created out of the Smart Contract ABI, you can discover all its endpoints on the REST tab. To see examples in your technology of choice use the dropdown in the example section on the right.
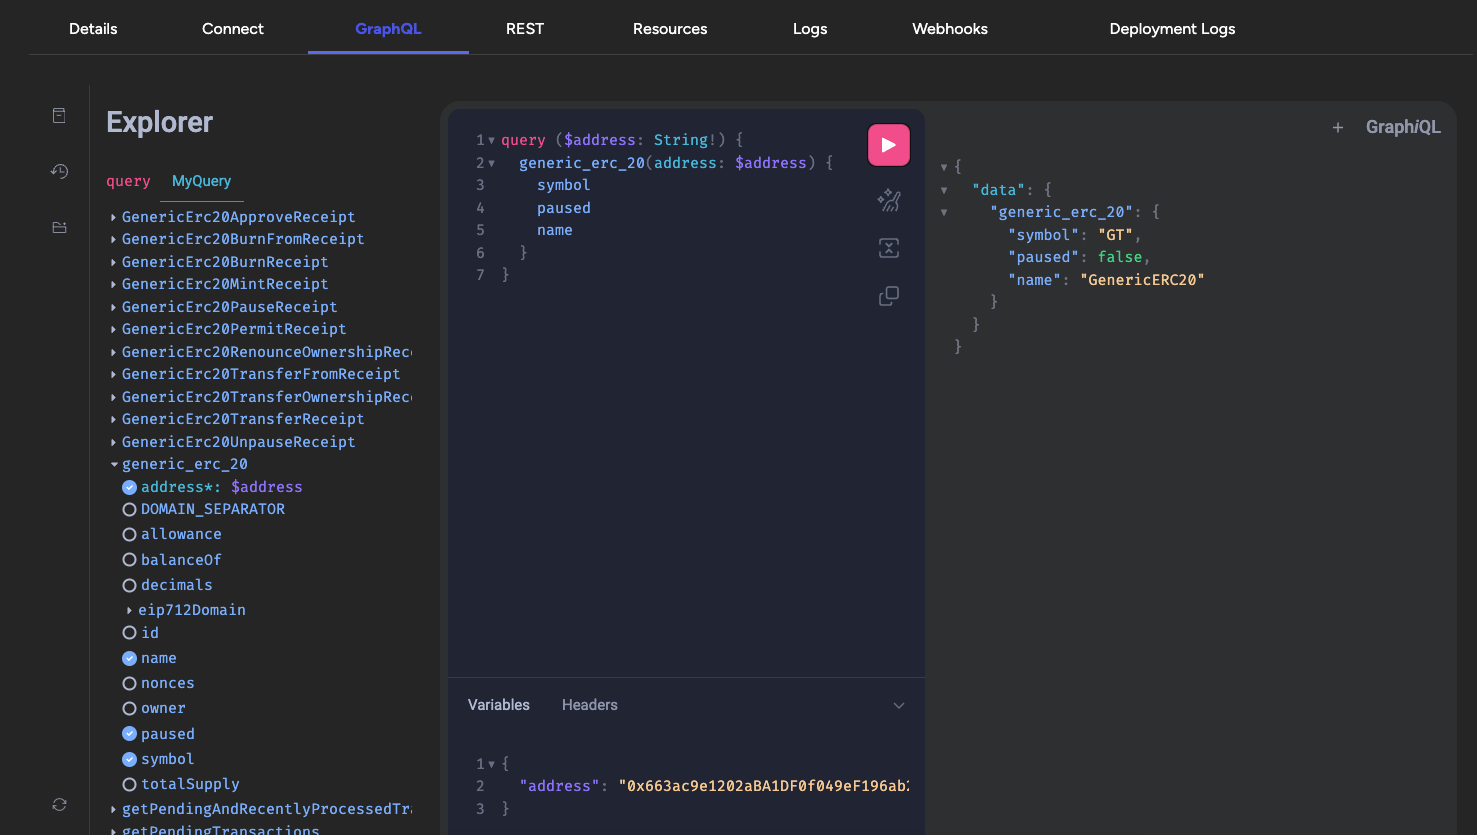
GraphQL
The GraphQL api exposes the same functionality as the REST api, you can discover it on the GraphQL tab.
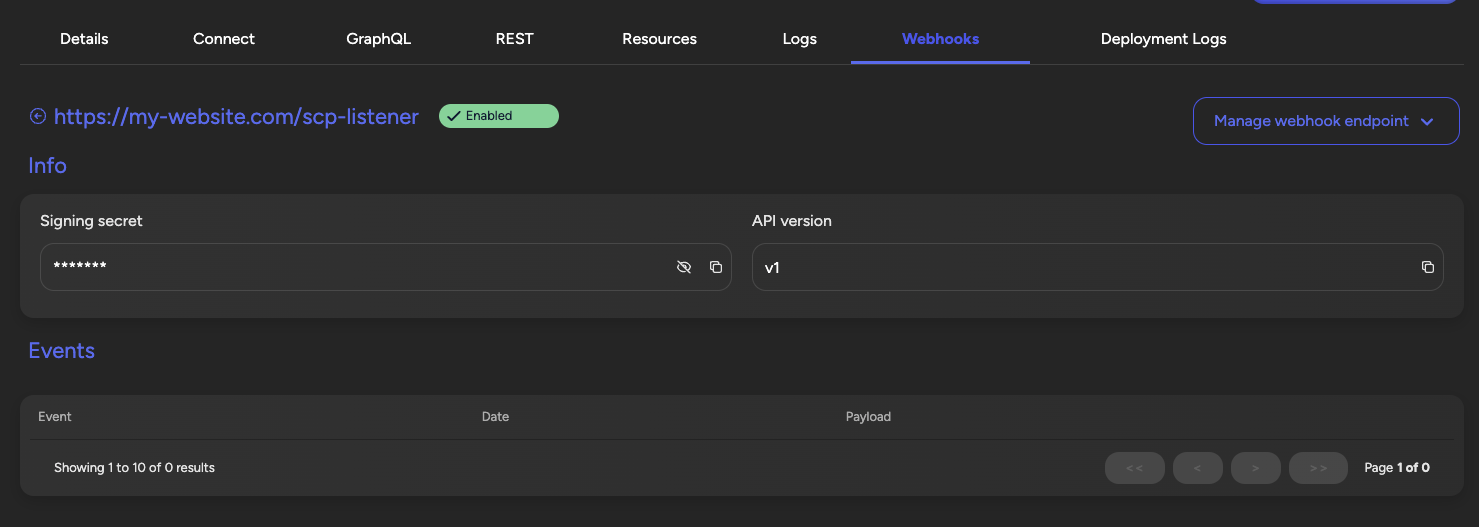
Webhooks
On the Webhooks tab you can register your own webhook. The portal will send events to this webhook when a transaction is processed.
When sending a message the event will have a signature which allows the receiver to validate if the event has not been tampered with.
The secret to validate the signature can be copied from the details page of your webhook.
Standard Webhooks has built SDKs and useful tools using different programming languages that make it easy to start using webhooks.
An example using Typescript, Elysia and standard webhooks.
import { Elysia, t } from "elysia";
import { Webhook } from "standardwebhooks";

async function webhookConsumerBootstrap(secret: string) {
  const webhookConsumer = new Elysia().post(
    "/scp-listener",
    ({ headers, body }) => {
      try {
        const wh = new Webhook(btoa(secret));
        const verifiedPayload = wh.verify(JSON.stringify(body.payload), {
          "webhook-id": headers["btp-portal-event-id"]!,
          "webhook-signature": headers["btp-portal-event-signature"]!,
          "webhook-timestamp": headers["btp-portal-event-timestamp"]!,
        });
        console.log(
          `Received a webhook event: ${JSON.stringify(verifiedPayload)}`
        );
      } catch (err) {
        console.error("Webhook payload invalid", err);
        throw err;
      }
    },
    {
      body: t.Object({
        payload: t.Object({
          apiVersion: t.String(),
          eventId: t.String(),
          eventName: t.String(),
          timestamp: t.Number(),
          data: t.Any(),
        }),
      }),
    }
  );
  const app = new Elysia().use(webhookConsumer).onStart(({ server }) => {
    console.log(
      `Started the test webhook consumer on ${server?.url.toString()}`
    );
  });
  return app;
}

webhookConsumerBootstrap(process.env.WEBHOOK_SECRET!)
  .then((app) => app.listen(process.env.PORT || 5555))
  .catch((error: Error) => {
    console.error("Failed to start webhook consumer", error);
    process.exit(1);
  });
Websocket
The websocket endpoint exposes functionality to get real time updates on processed transactions.
The url can be copied from the Connect tab.
import type { TransactionReceipt } from "viem";

// Should include an api key (eg wss://smart-contract-portal-middleware.settlemint.com/sm_pat_.../ws)
const webSocketHost = process.env.WS_URL!;

/**
 * Wait for the transaction receipt
 * @param transactionHash hash
 * @returns transaction receipt
 */
export async function waitForTransactionReceipt(transactionHash: string) {
  const webSocket = new WebSocket(webSocketHost);

  return new Promise<TransactionReceipt>((resolve, reject) => {
    let isResolved = false;
    webSocket.onmessage = (event) => {
      isResolved = true;
      const receiptJson = JSON.parse(event.data) as TransactionReceipt;
      resolve(receiptJson);
      webSocket.close();
    };
    webSocket.onerror = reject;
    webSocket.onclose = () => {
      if (!isResolved) {
        reject(new Error("Nothing received from the WebSocket"));
      }
    };
    if (webSocket.readyState === WebSocket.OPEN) {
      webSocket.send(JSON.stringify({ transactionHash }));
    } else if (webSocket.readyState === WebSocket.CONNECTING) {
      webSocket.onopen = () => {
        webSocket.send(JSON.stringify({ transactionHash }));
      };
    } else {
      reject(
        new Error(`No connection to the WebSocket: ${webSocket.readyState}`)
      );
    }
  });
}
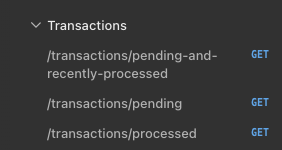
Transactions api
The portal exposes some general purpose APIs for transactions. This could be used for example to display transactions which are pending or processed in your UI. Both REST and GraphQL offer this functionality.